1. Jenkins Download
Other download links: https://get.jenkins.io/war-stable/
Latest version download link: https://www.jenkins.io/download/
Download the version that suits you, this installation uses the latest version 2.462
2. Environment Installation
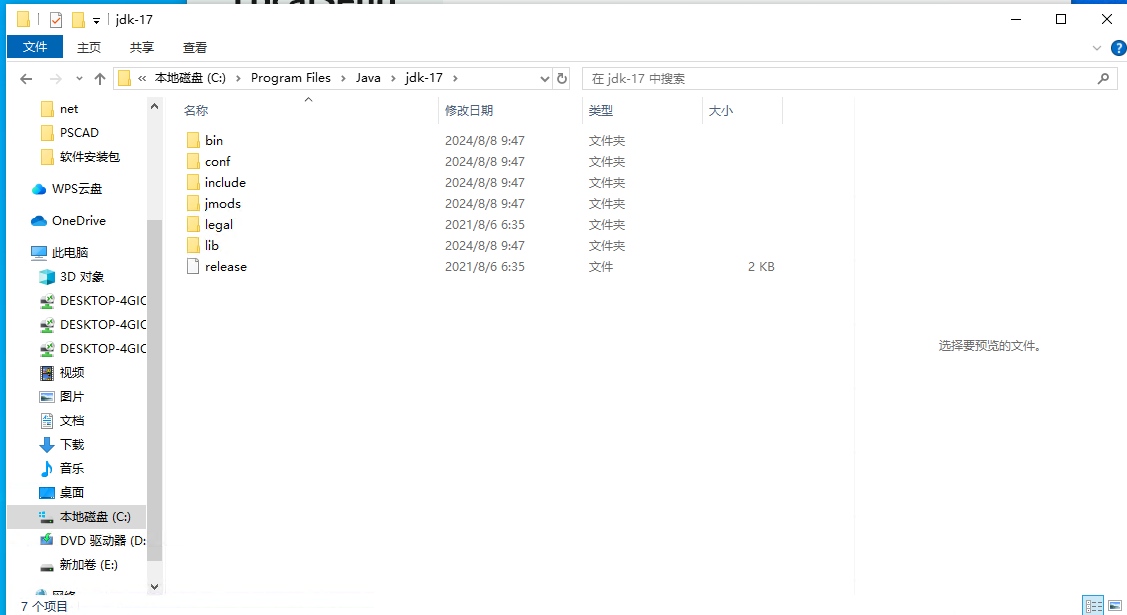
2.1 Install JDK17
Refer to the blog: https://blog.csdn.net/shengma76/article/details/133640356
Download link: https://jdk.java.net/java-se-ri/17
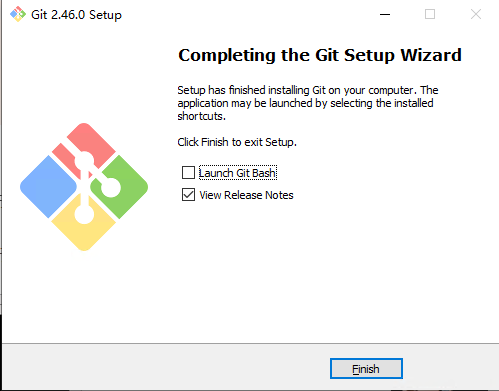
2.2 Install git
Refer to the blog: https://blog.csdn.net/qq_45281589/article/details/134650456
Download link: https://git-scm.com/download/win
2.3 Install Maven
Download link: https://maven.apache.org/download.cgi
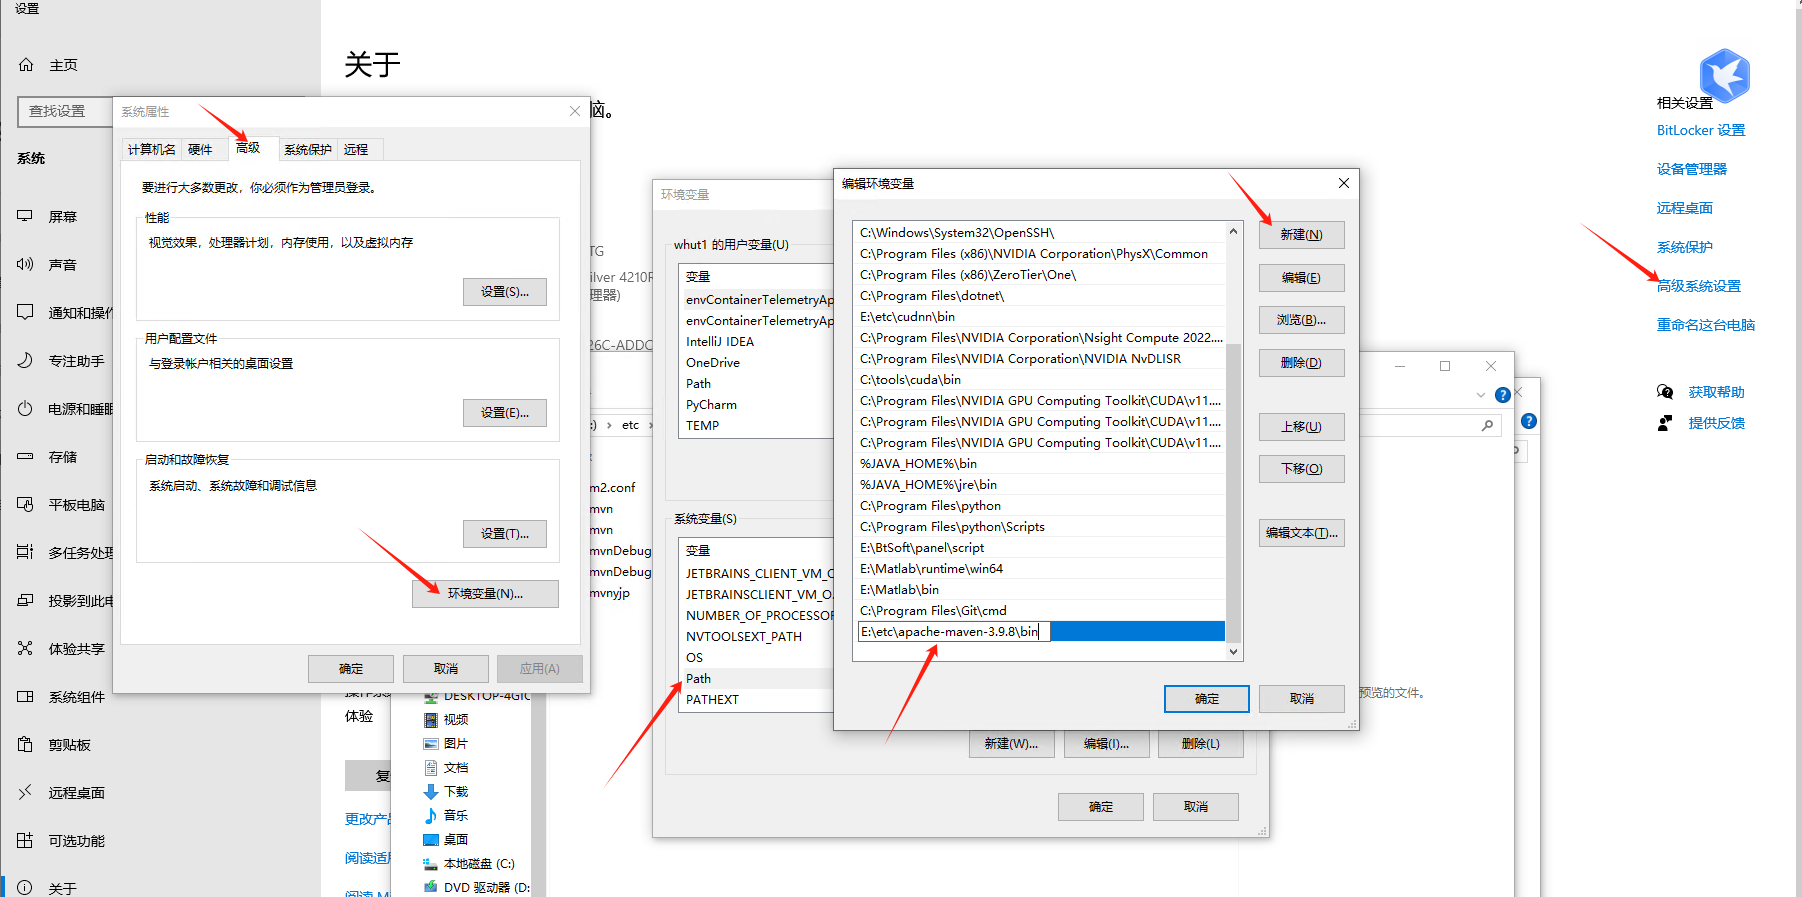
Unzip the downloaded Maven to a directory
Modify Maven configuration, open the setting.xml file, and add the following configuration
<mirrors>
  <!-- Alibaba Cloud Repository -->
  <mirror>
    <id>alimaven</id>
    <mirrorOf>central</mirrorOf>
    <name>aliyun maven</name>
    <url>http://maven.aliyun.com/nexus/content/repositories/central/</url>
  </mirror>
  <!-- Central Repository -->
  <mirror>
    <id>repo1</id>
    <mirrorOf>central</mirrorOf>
    <name>Human Readable Name for this Mirror.</name>
    <url>http://repo1.maven.org/maven2</url>
  </mirror>

  <mirror>
    <id>central</id>
    <name>aliyun central</name>
    <url>https://maven.aliyun.com/repository/central</url>
    <mirrorOf>central</mirrorOf>
  </mirror>
  <mirror>
    <id>google</id>
    <name>aliyun google</name>
    <url>https://maven.aliyun.com/repository/google</url>
    <mirrorOf>google</mirrorOf>
  </mirror>
  <mirror>
    <id>public</id>
    <name>aliyun public</name>
    <url>https://maven.aliyun.com/repository/public</url>
    <mirrorOf>public</mirrorOf>
  </mirror>
  <mirror>
    <id>gradle-plugin</id>
    <name>aliyun gradle-plugin</name>
    <url>https://maven.aliyun.com/repository/gradle-plugin</url>
    <mirrorOf>gradle-plugin</mirrorOf>
  </mirror>
  <mirror>
    <id>spring</id>
    <name>aliyun spring</name>
    <url>https://maven.aliyun.com/repository/spring</url>
    <mirrorOf>spring</mirrorOf>
  </mirror>
  <mirror>
    <id>spring-plugin</id>
    <name>aliyun spring-plugin</name>
    <url>https://maven.aliyun.com/repository/spring-plugin</url>
    <mirrorOf>spring-plugin</mirrorOf>
  </mirror>
  <mirror>
    <id>grails-core</id>
    <name>aliyun grails-core</name>
    <url>https://maven.aliyun.com/repository/grails-core</url>
    <mirrorOf>grails-core</mirrorOf>
  </mirror>
  <mirror>
    <id>apache-snapshots</id>
    <name>aliyun apache-snapshots</name>
    <url>https://maven.aliyun.com/repository/apache-snapshots</url>
    <mirrorOf>apache-snapshots</mirrorOf>
  </mirrors>
Configure environment variables
3. Jenkins Installation and Configuration
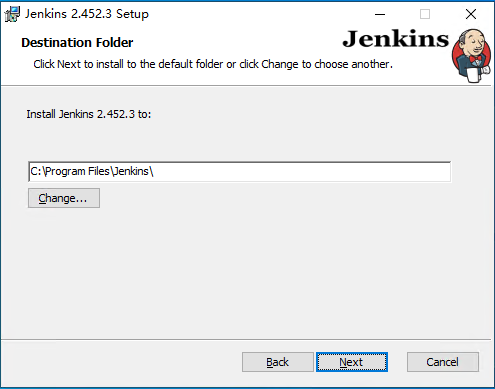
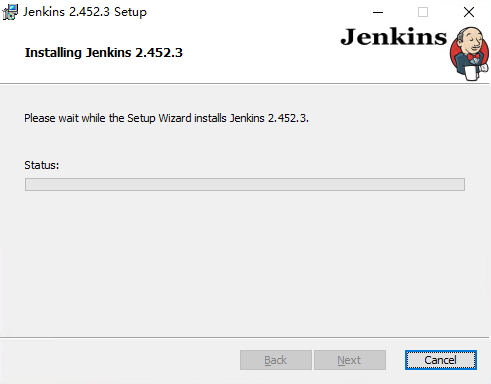
3.1 Installation
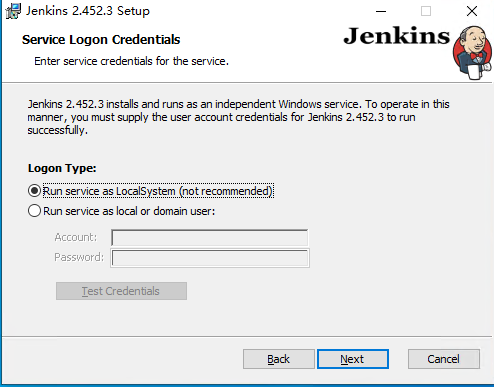
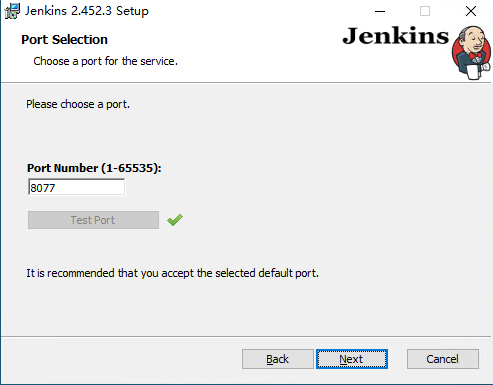
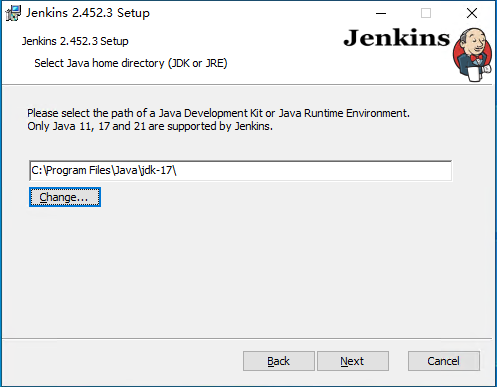
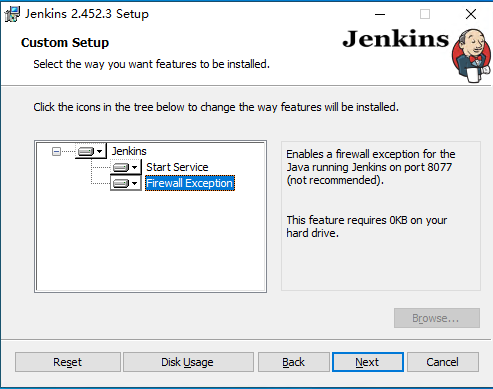
3.2 Configuration
After installation, enter 127.0.0.1:8077 in the browser, the actual port depends on your configuration
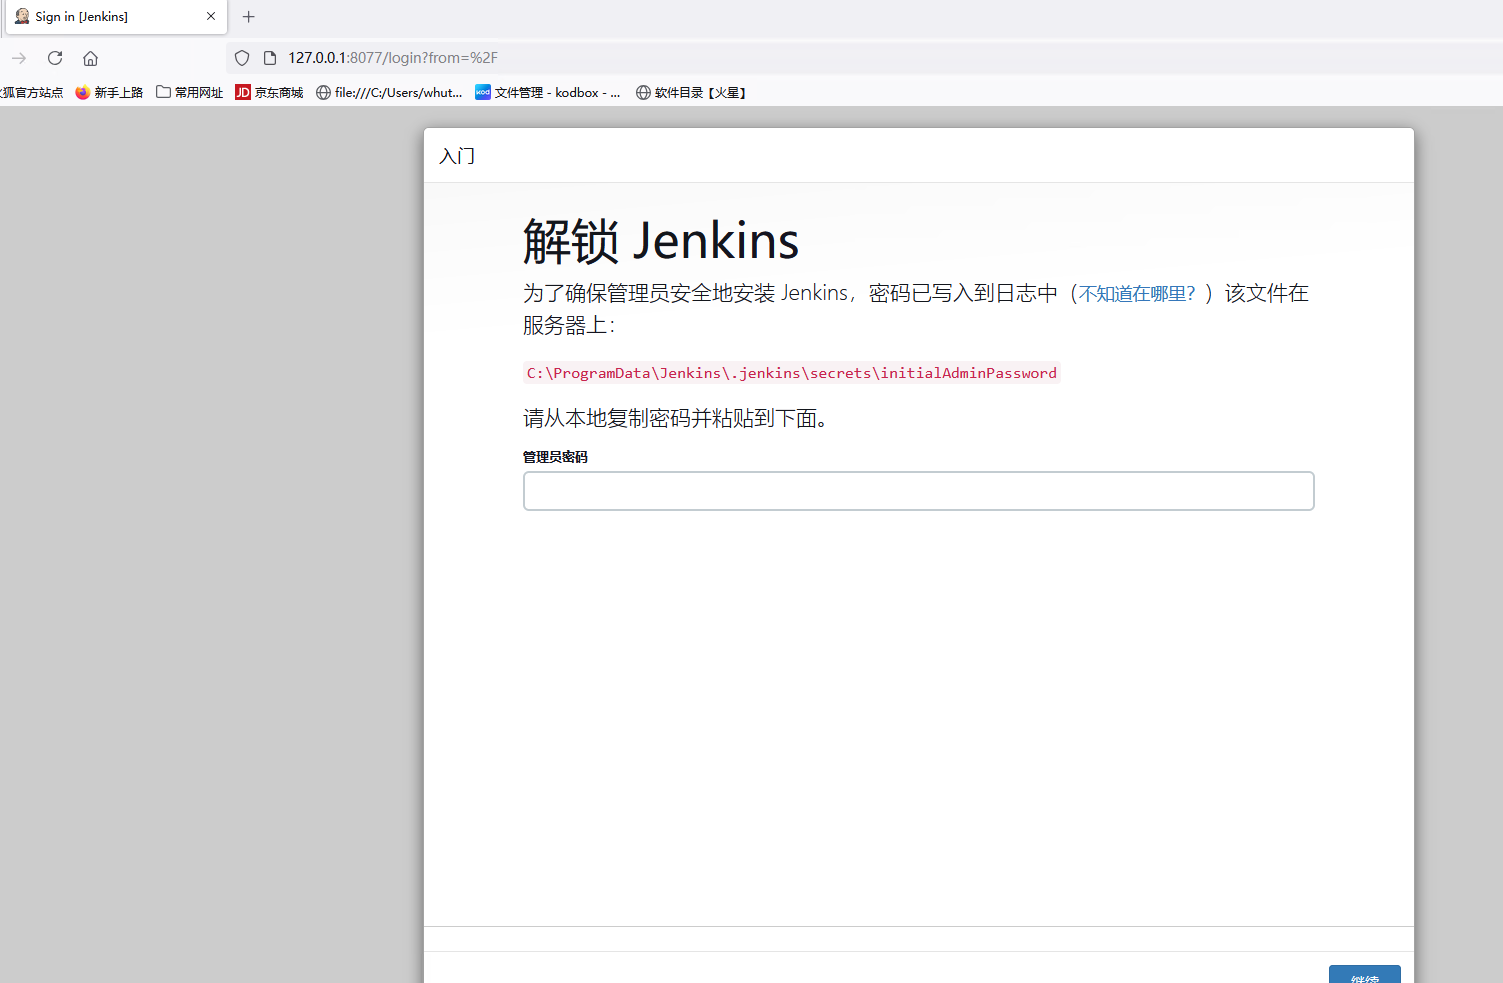
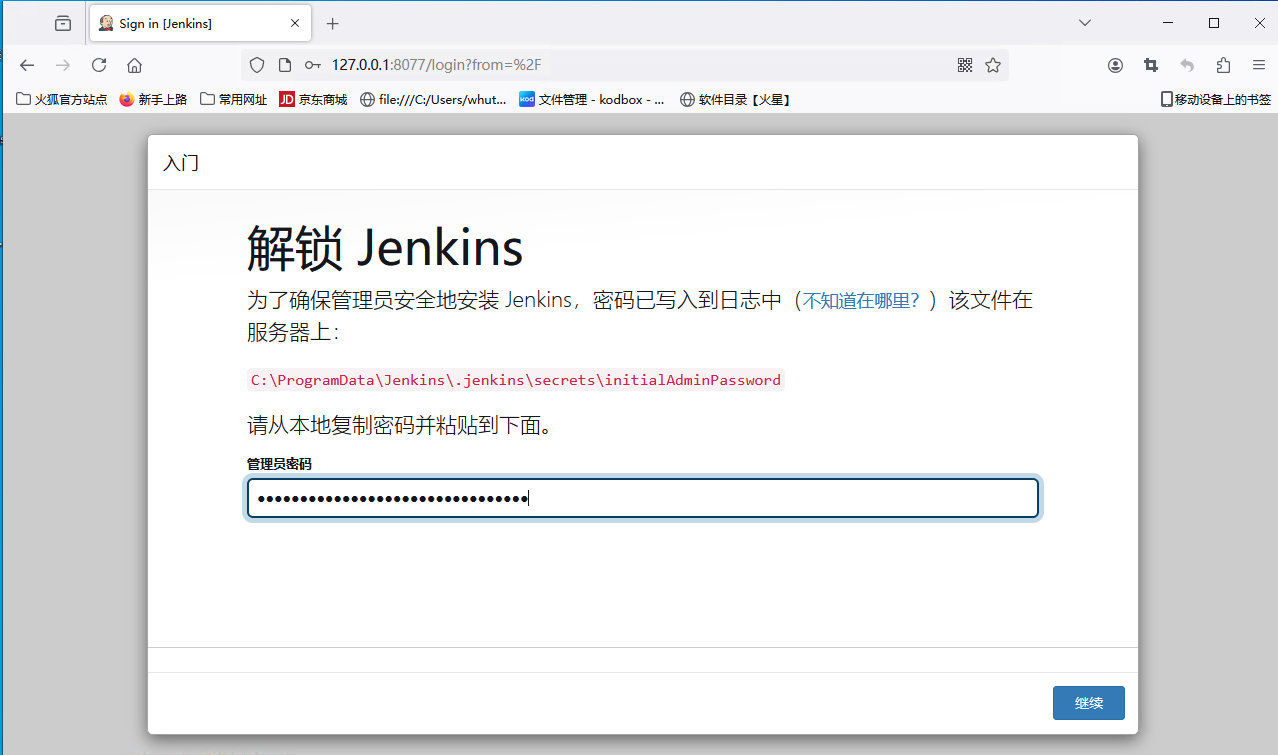
Open the C:\ProgramData\Jenkins\.jenkins\secrets\initialAdminPassword file to obtain the password
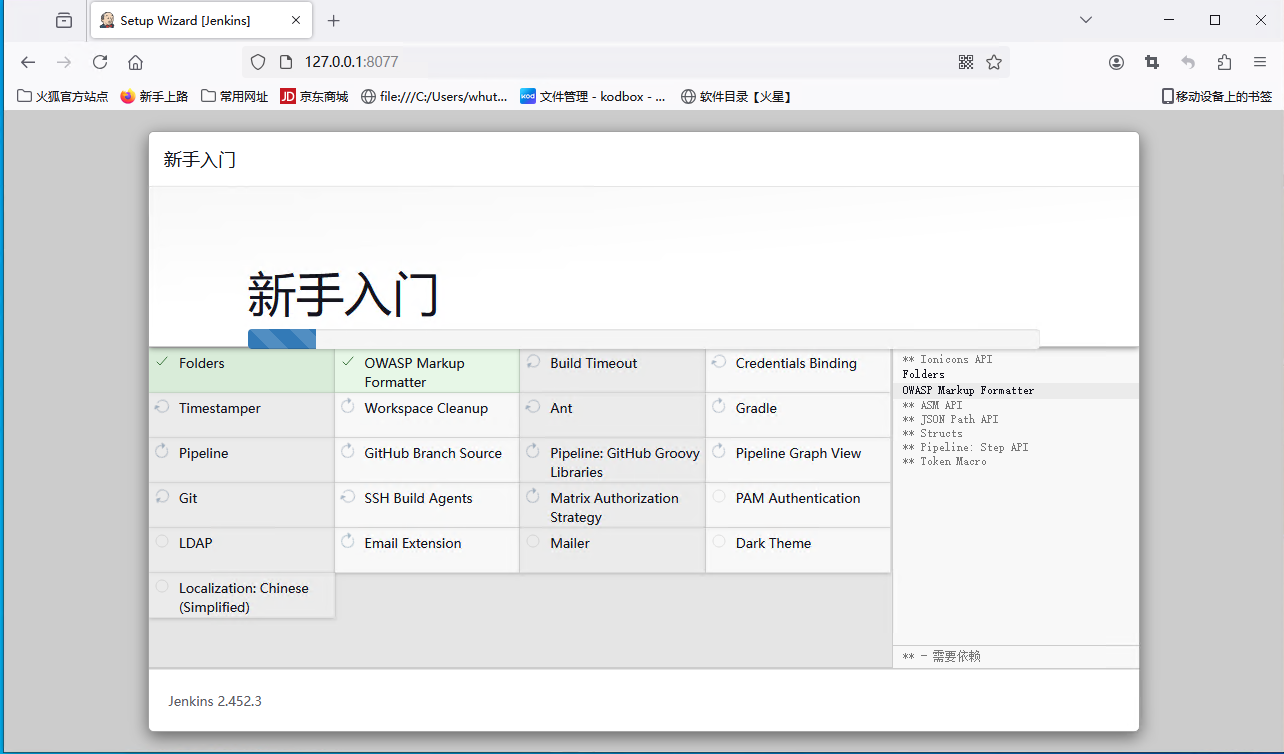
Install recommended plugins
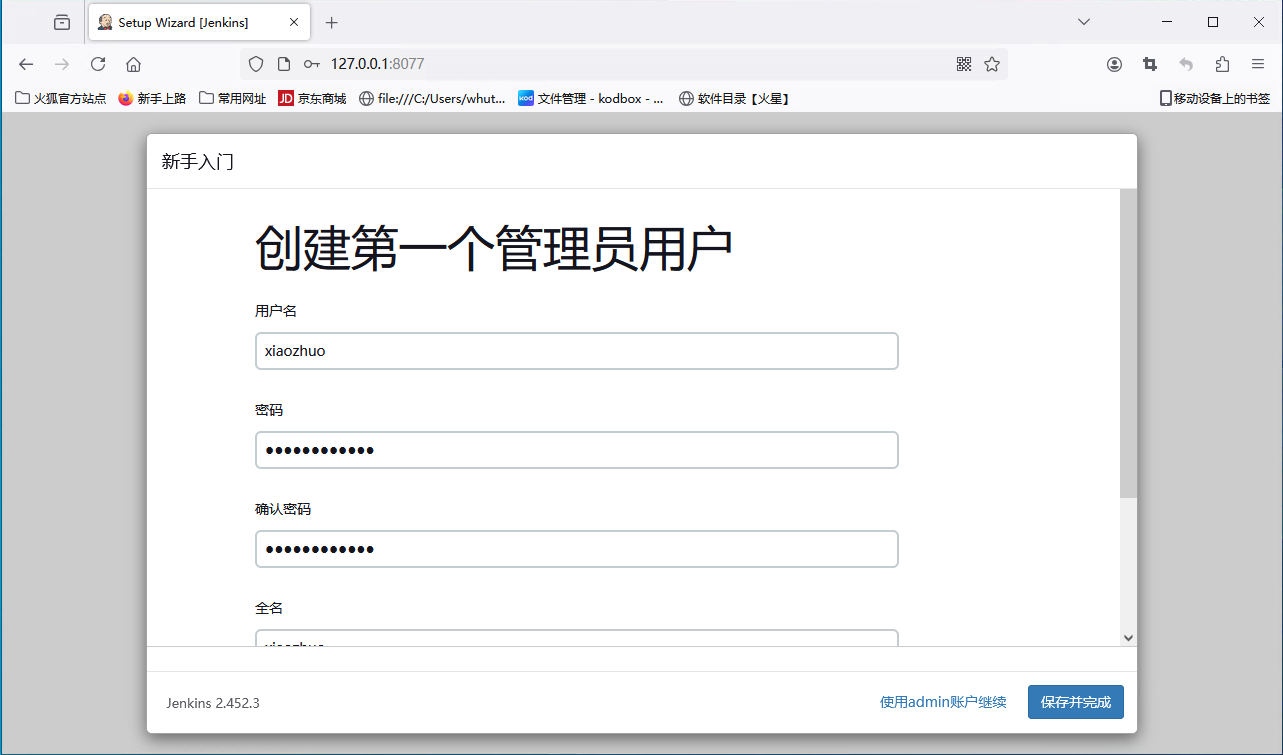
Create an account
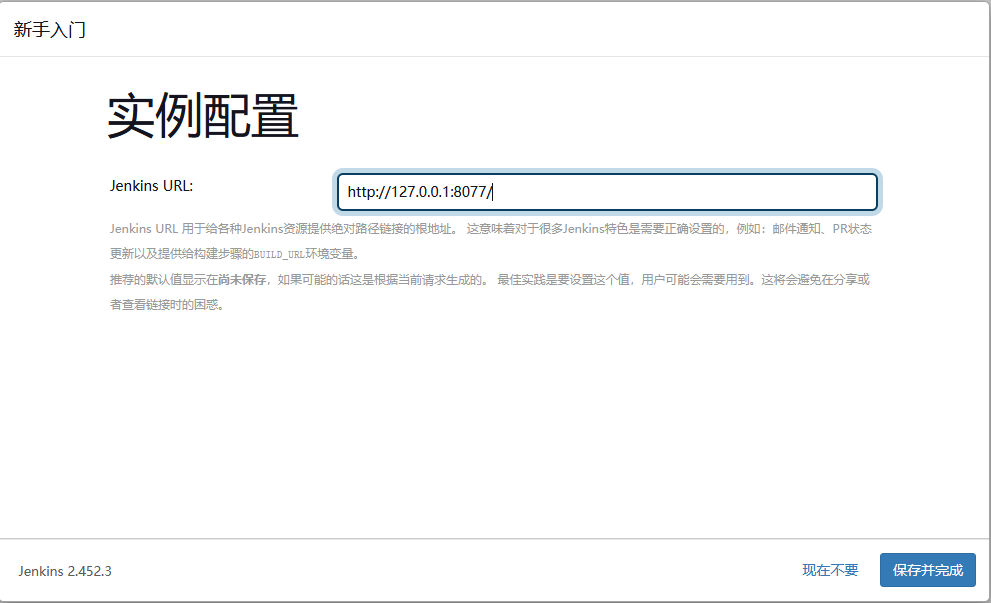
Configure the path
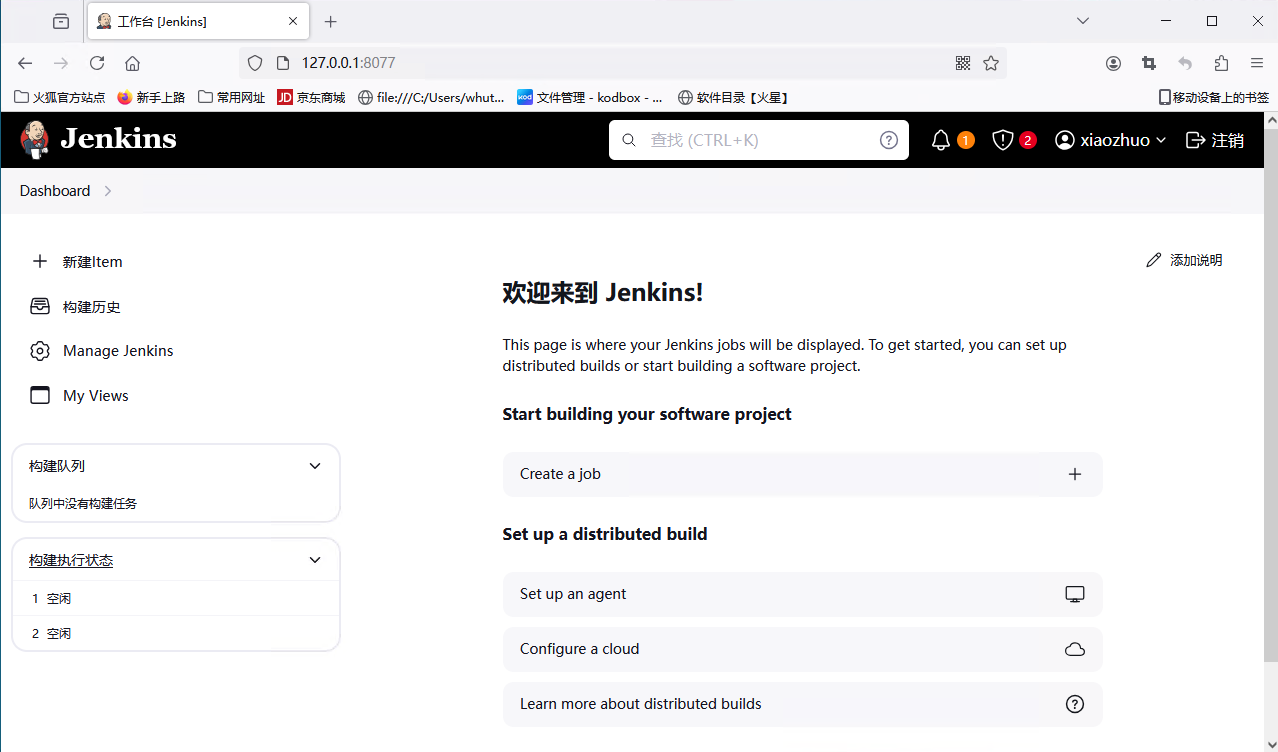
Configuration completion interface
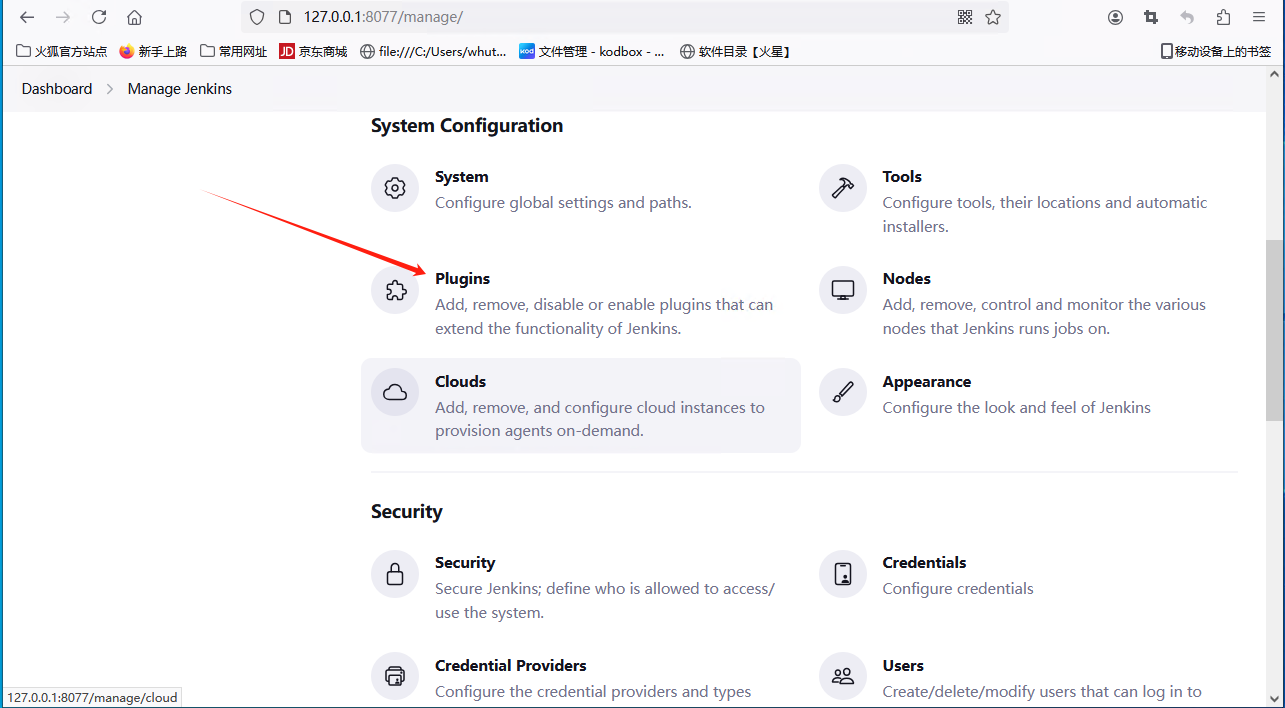
3.3 Install Plugins
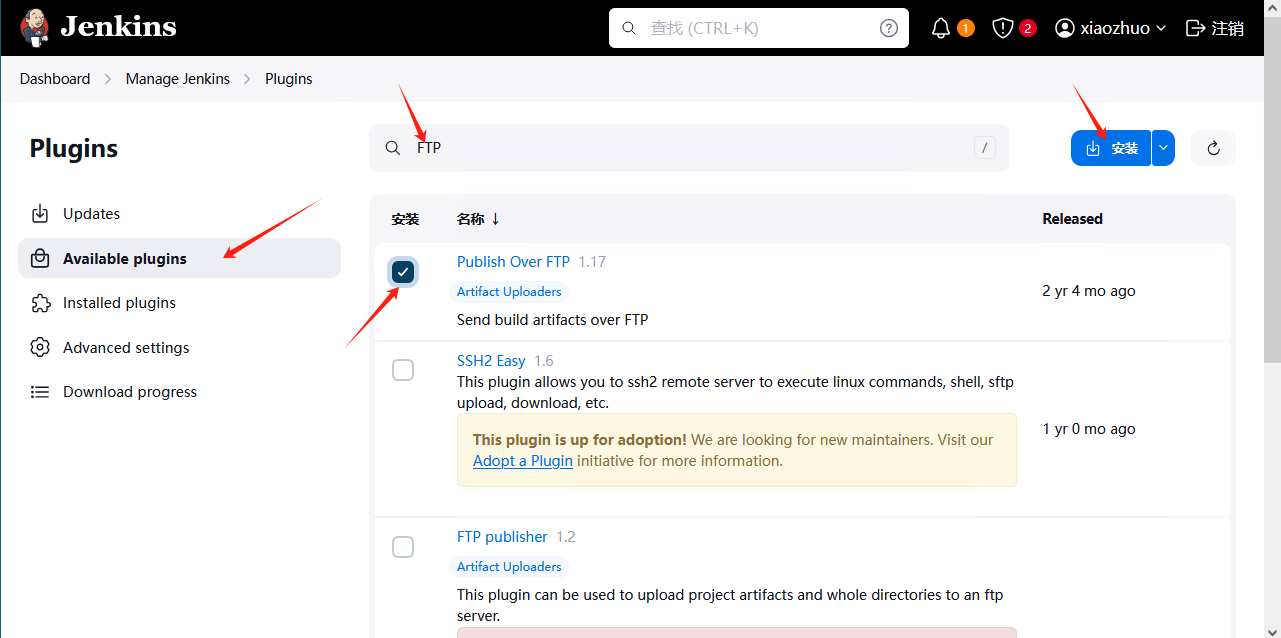
Install FTP plugin
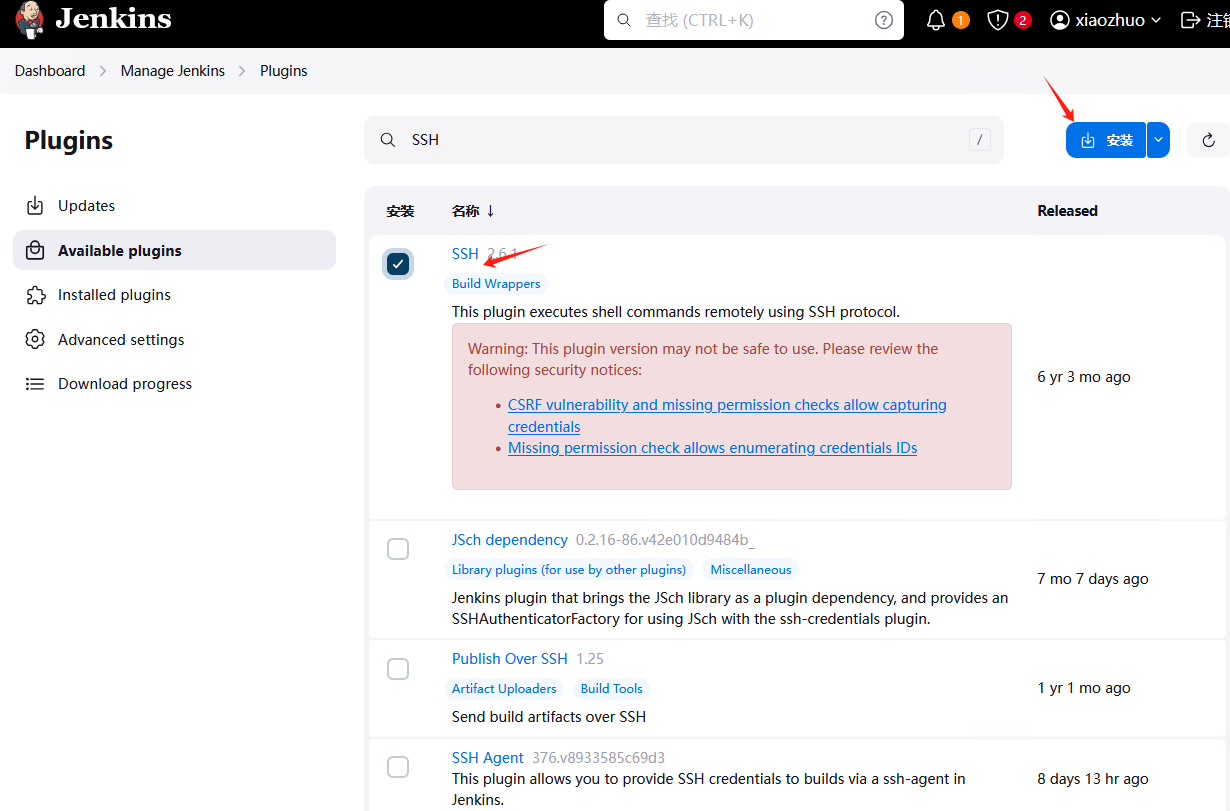
Install SSH plugin
3.4 Configure Credentials
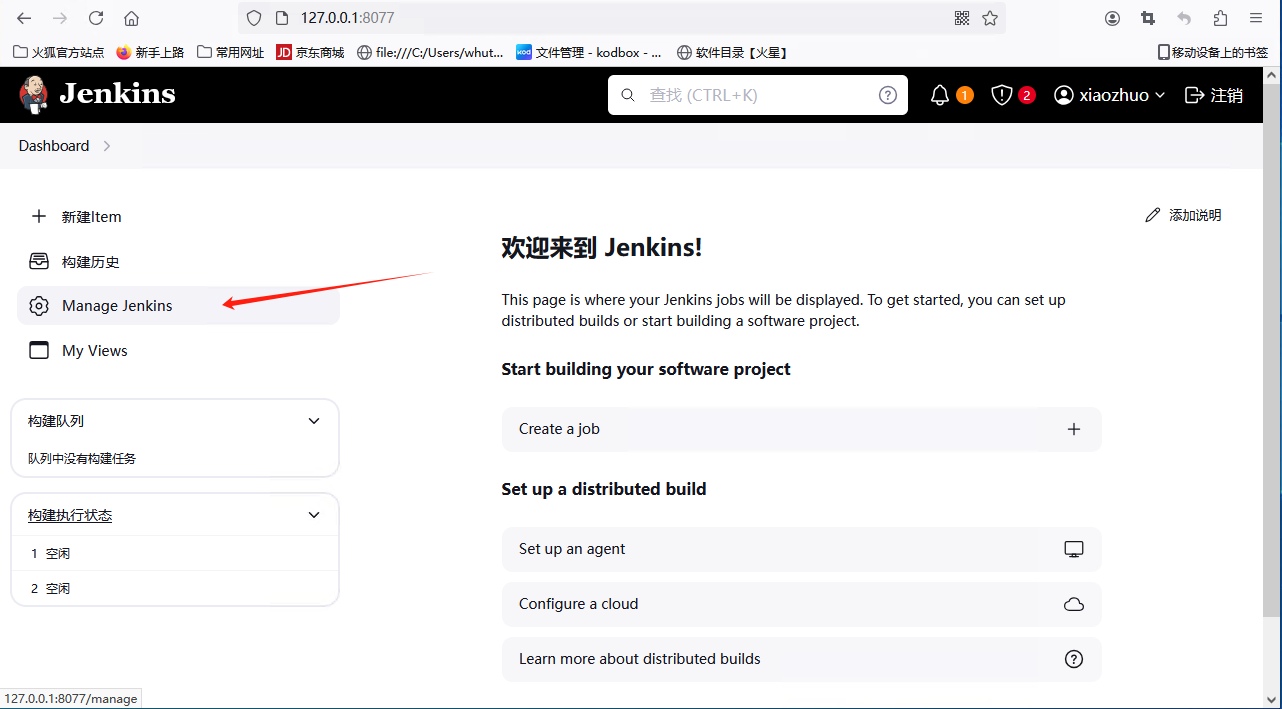
Go to http://127.0.0.1:8077/manage/credentials/ page
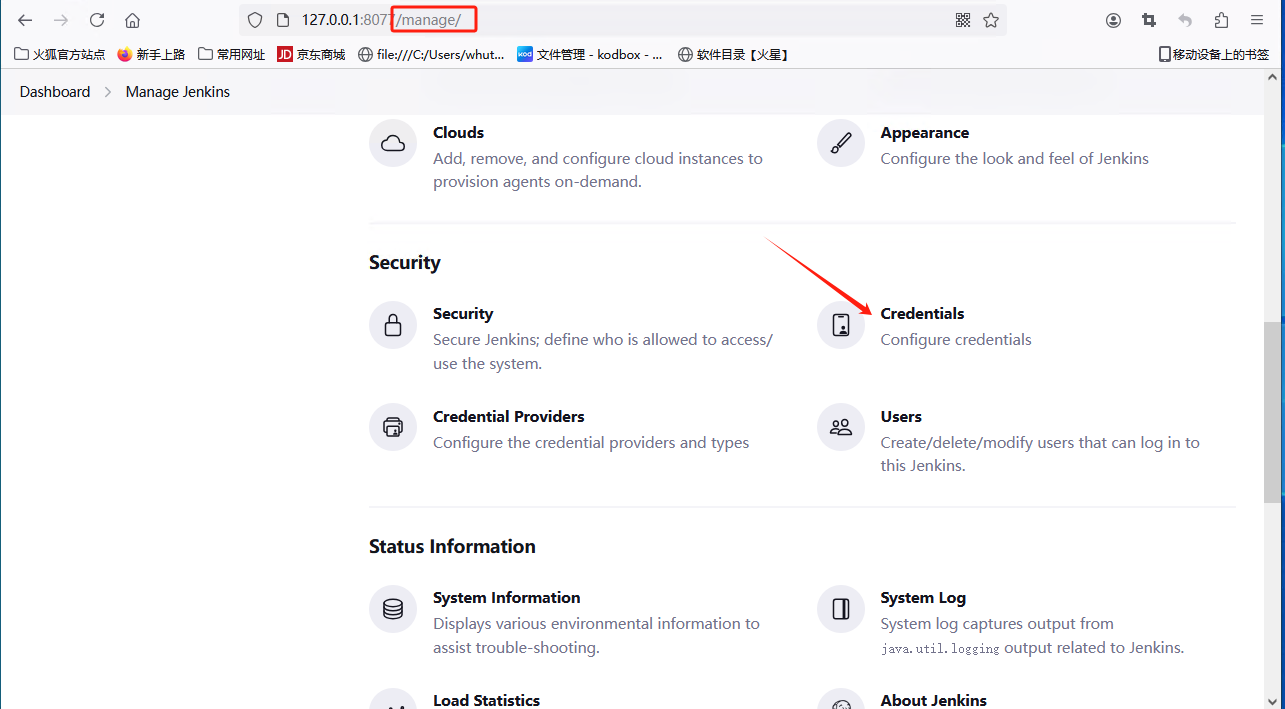
Go to http://127.0.0.1:8077/manage/credentials/ page
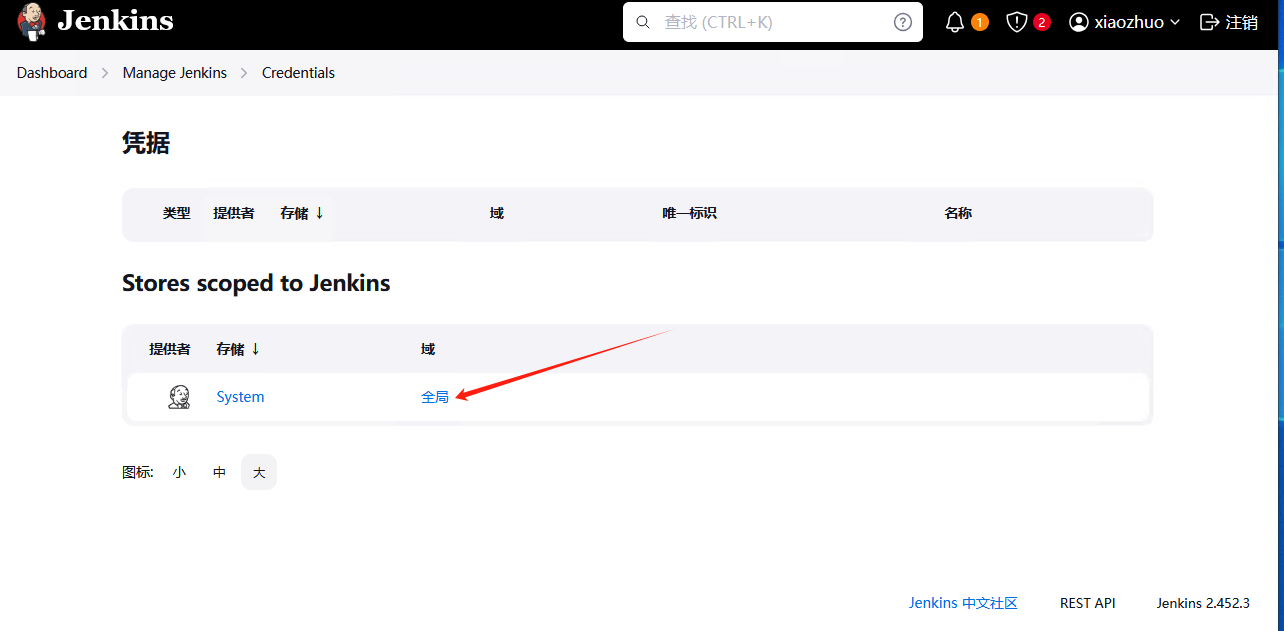
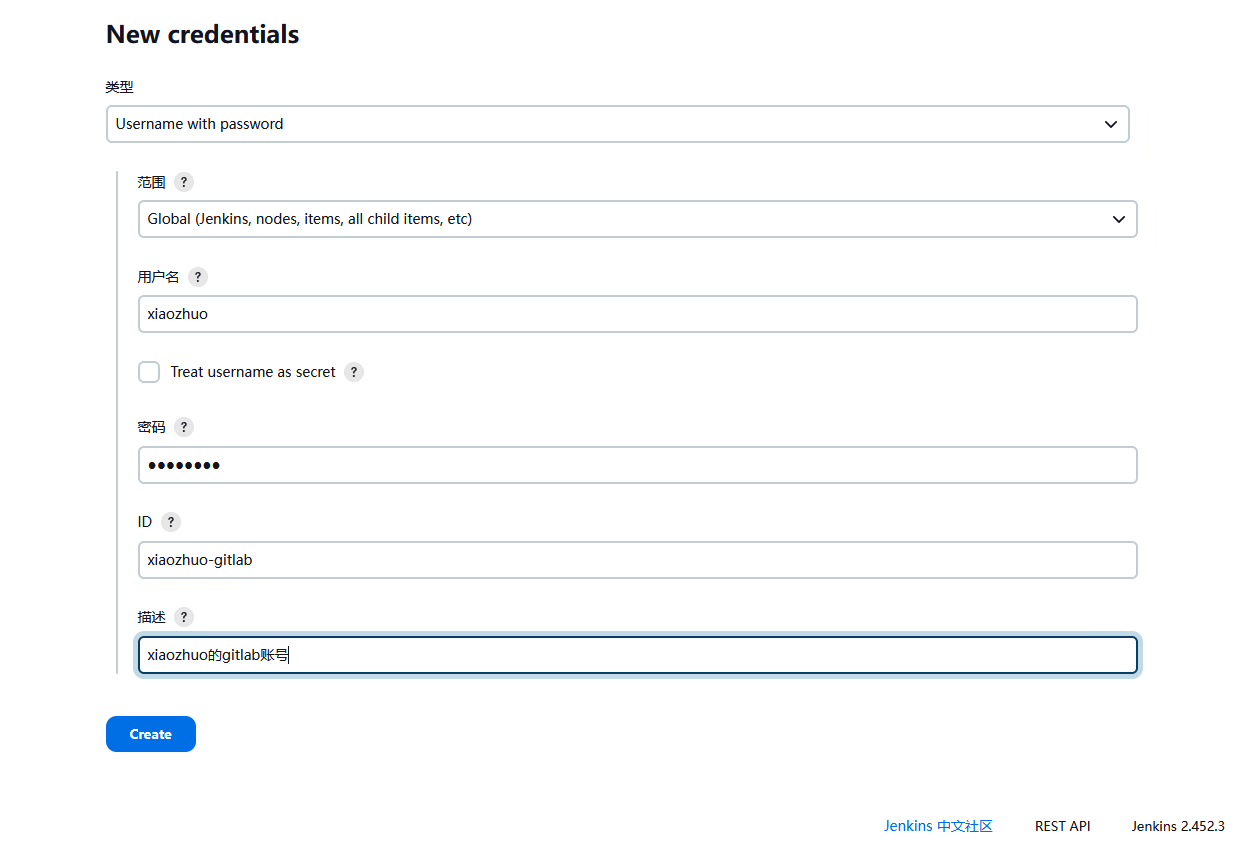
Configure a git login account
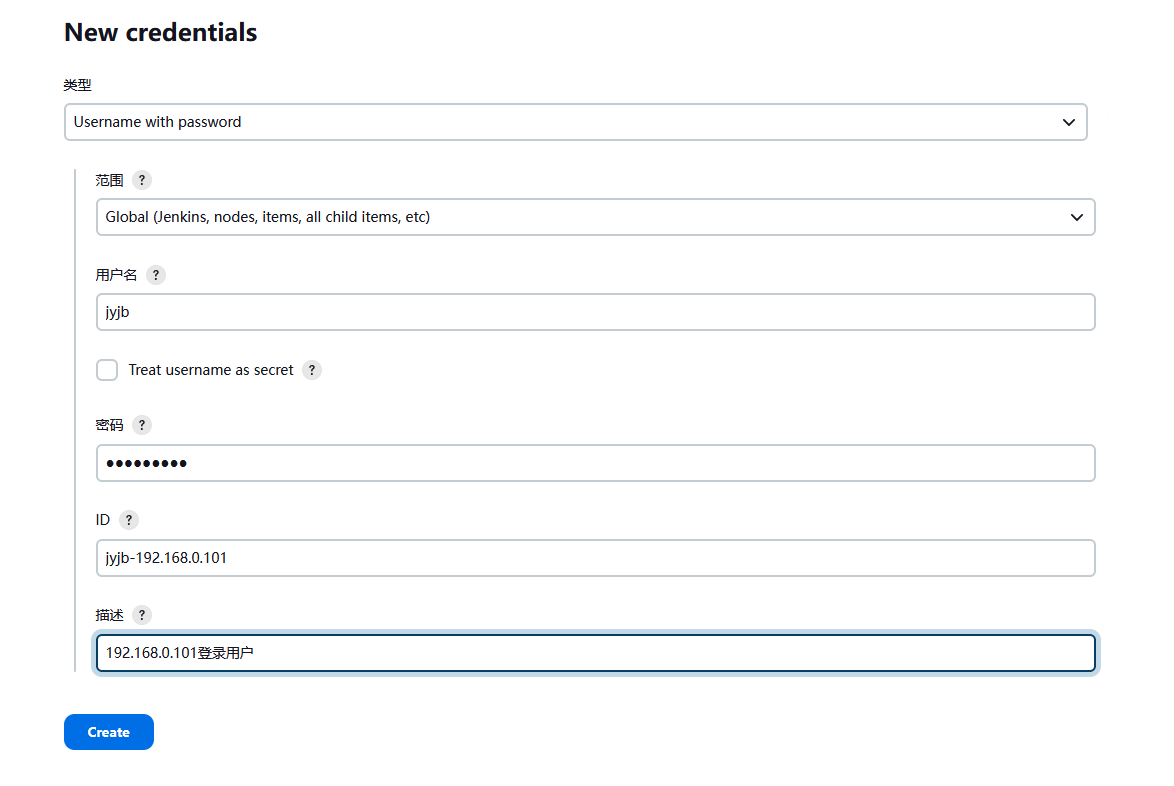
Configure a remote server SSH login account
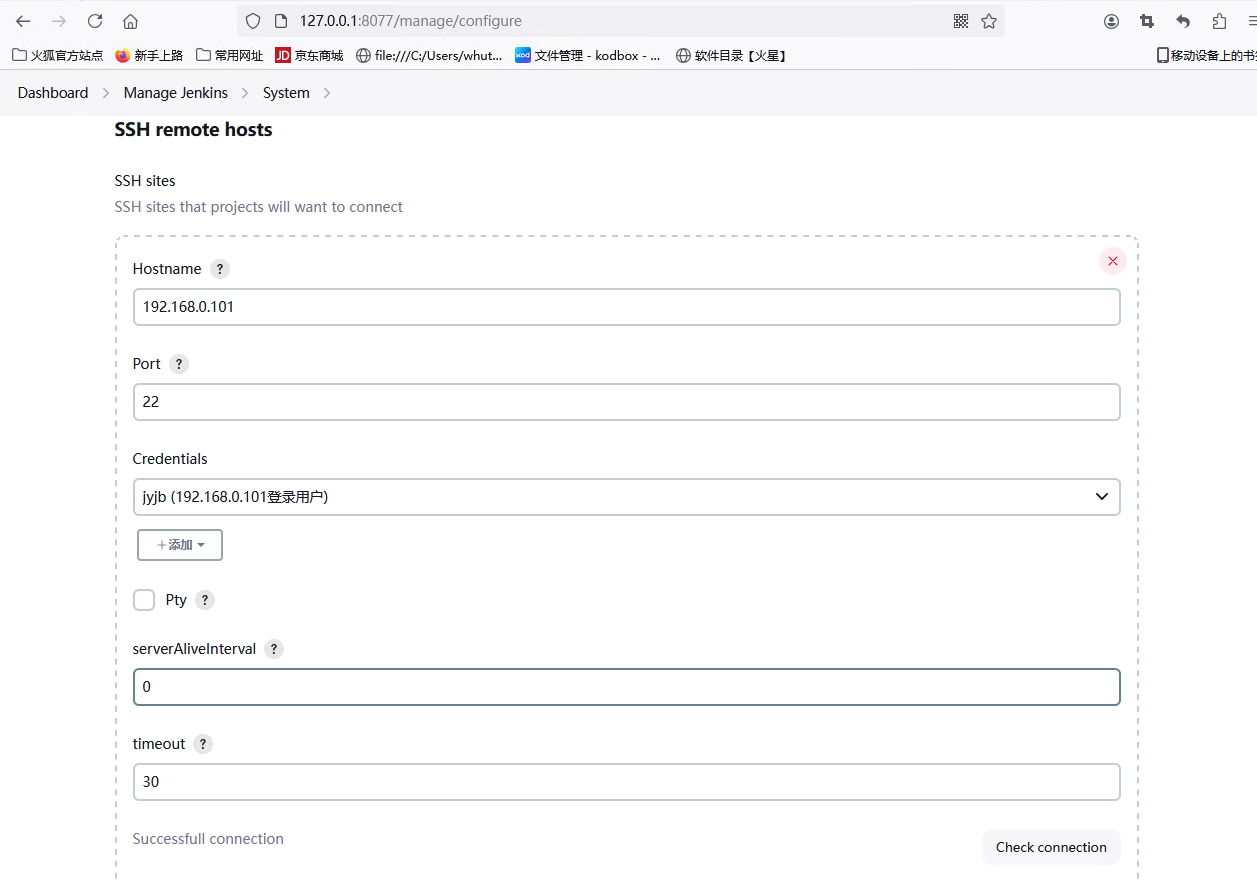
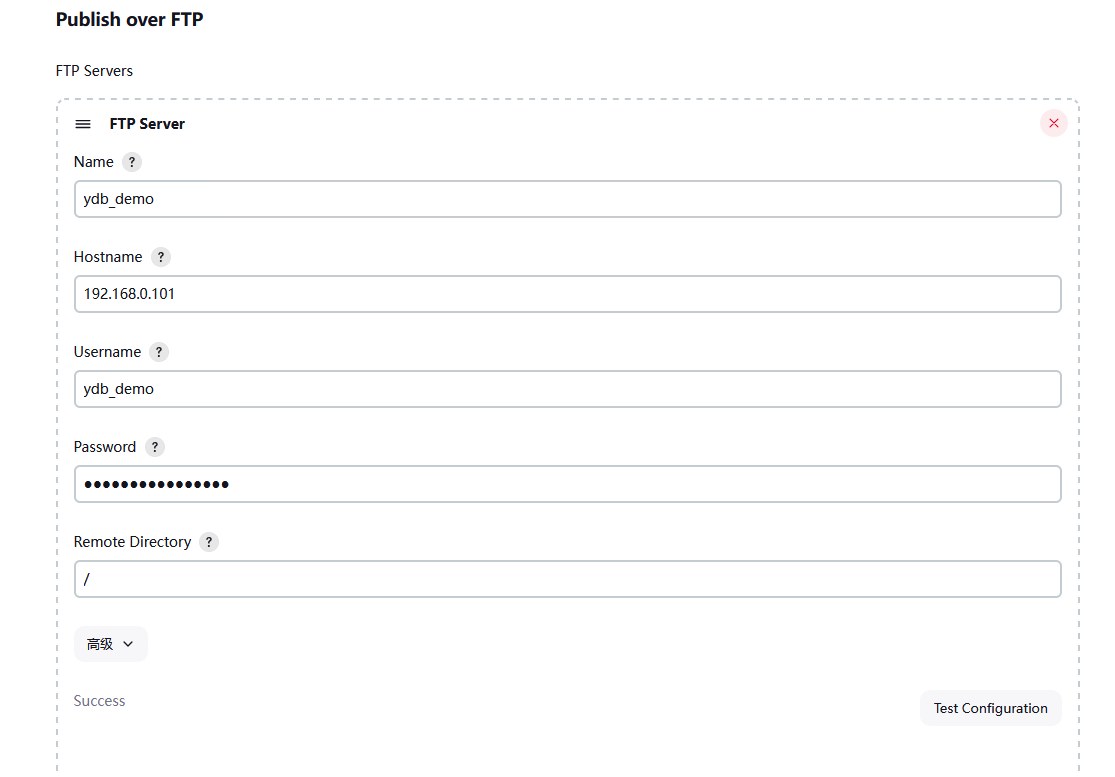
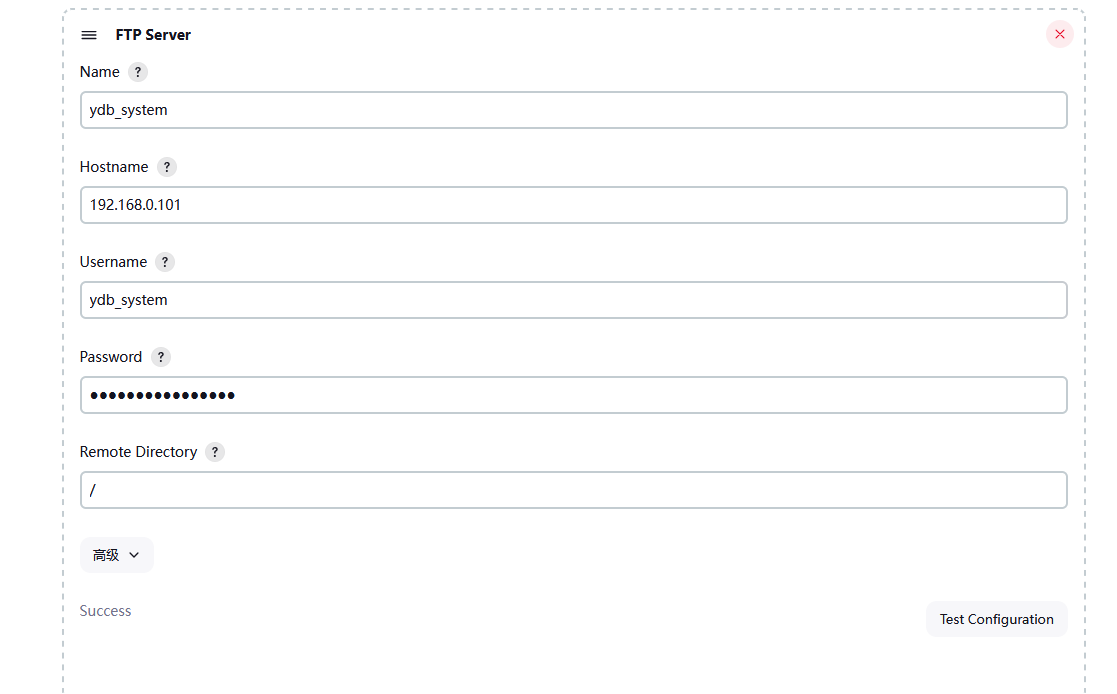
3.5 Configure SSH and FTP Services
Go to http://127.0.0.1:8077/manage/configure page
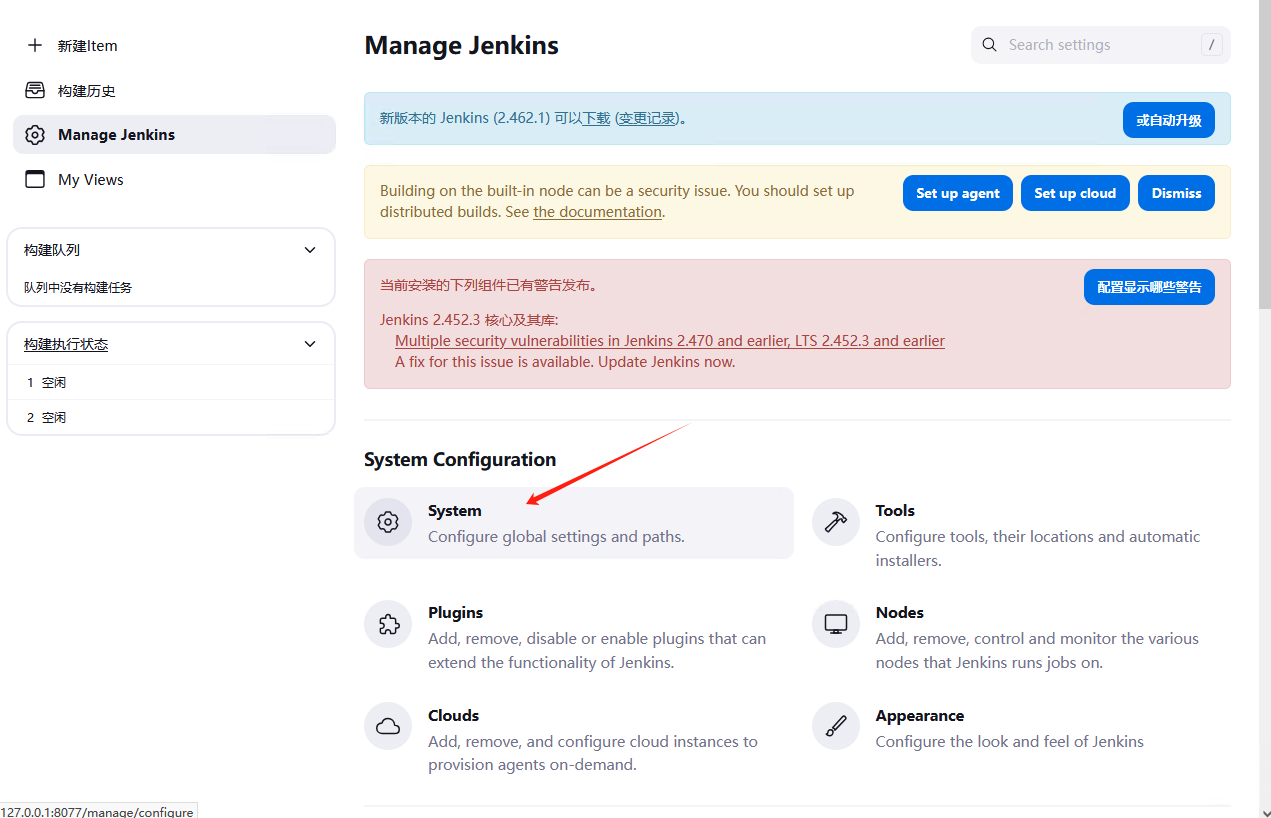
Add an SSH service
Add multiple FTP services
4. Configure Project
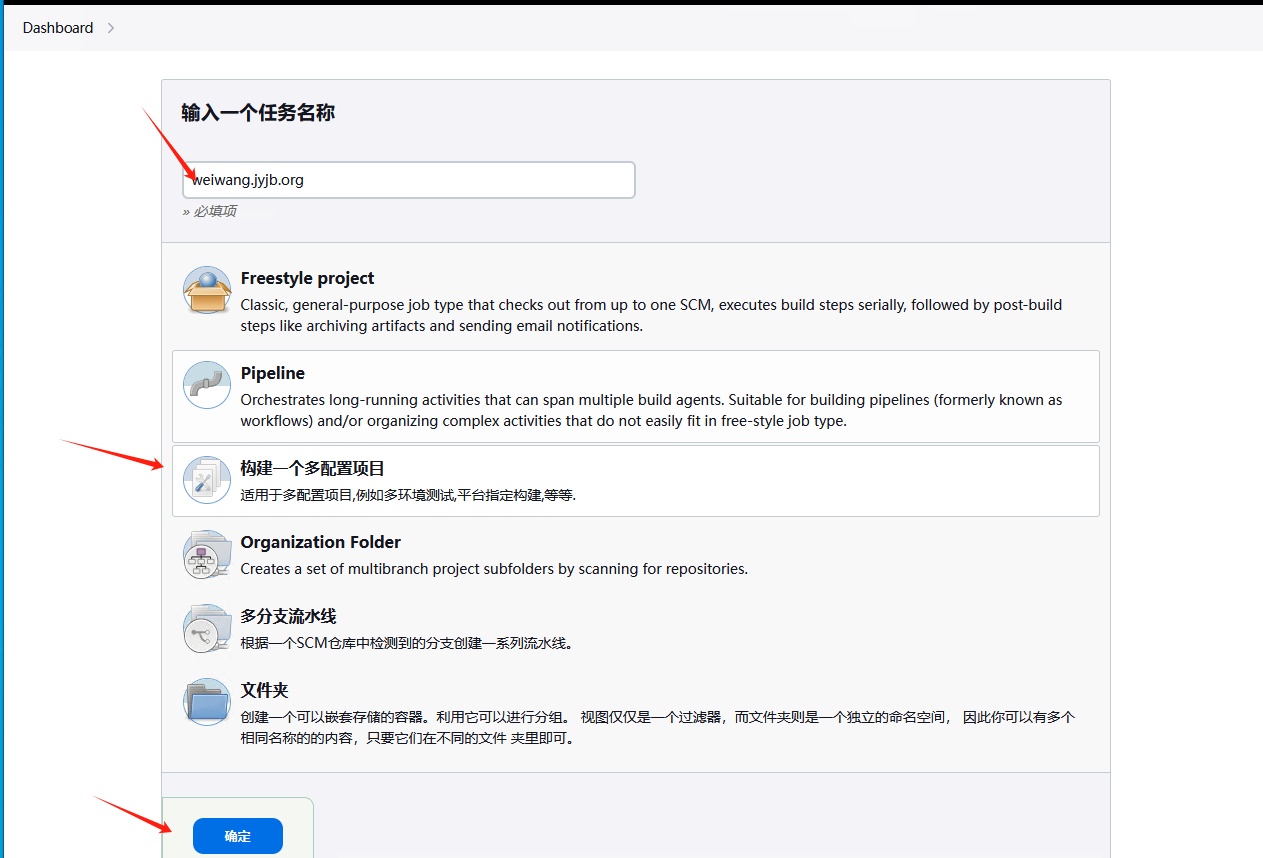
4.1 Create Project
Click New Item to create a new project
4.2 Pull Code
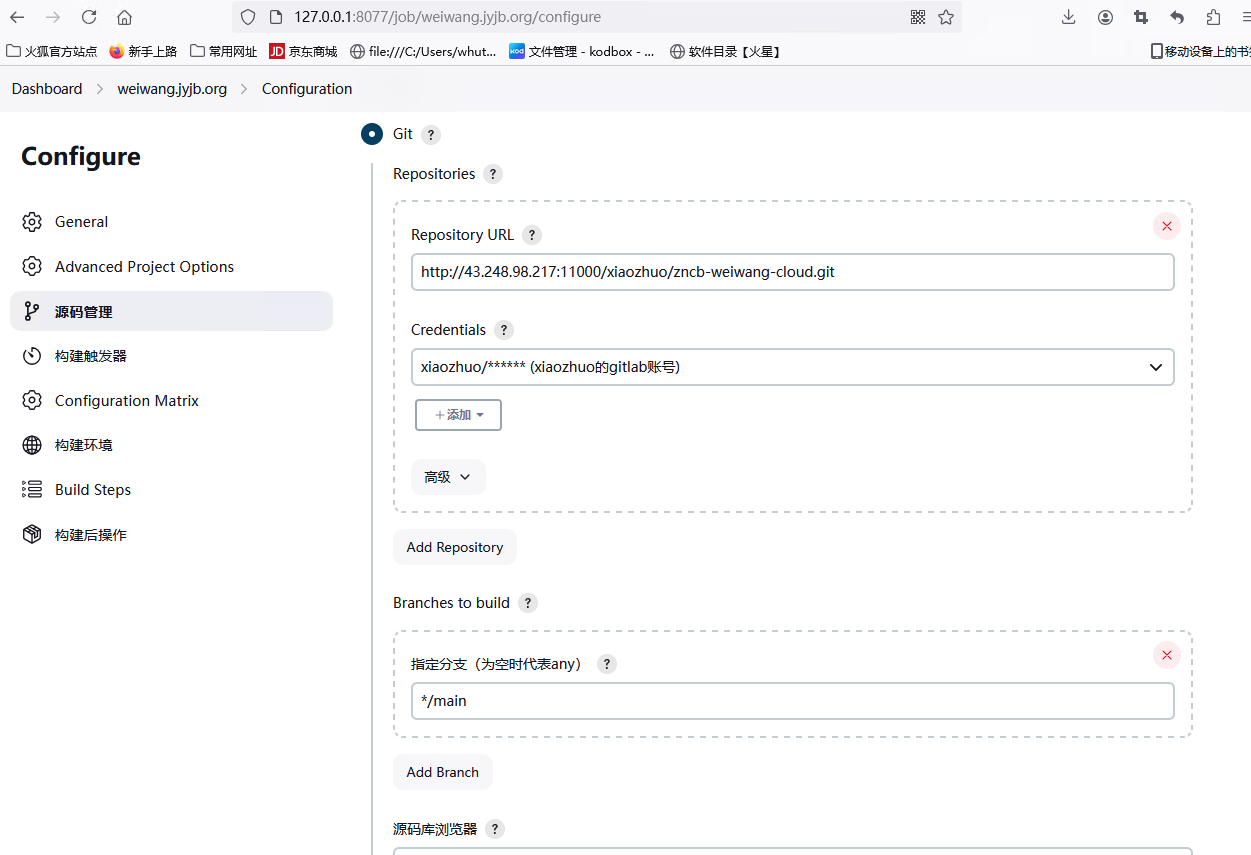
Configure the project’s Git
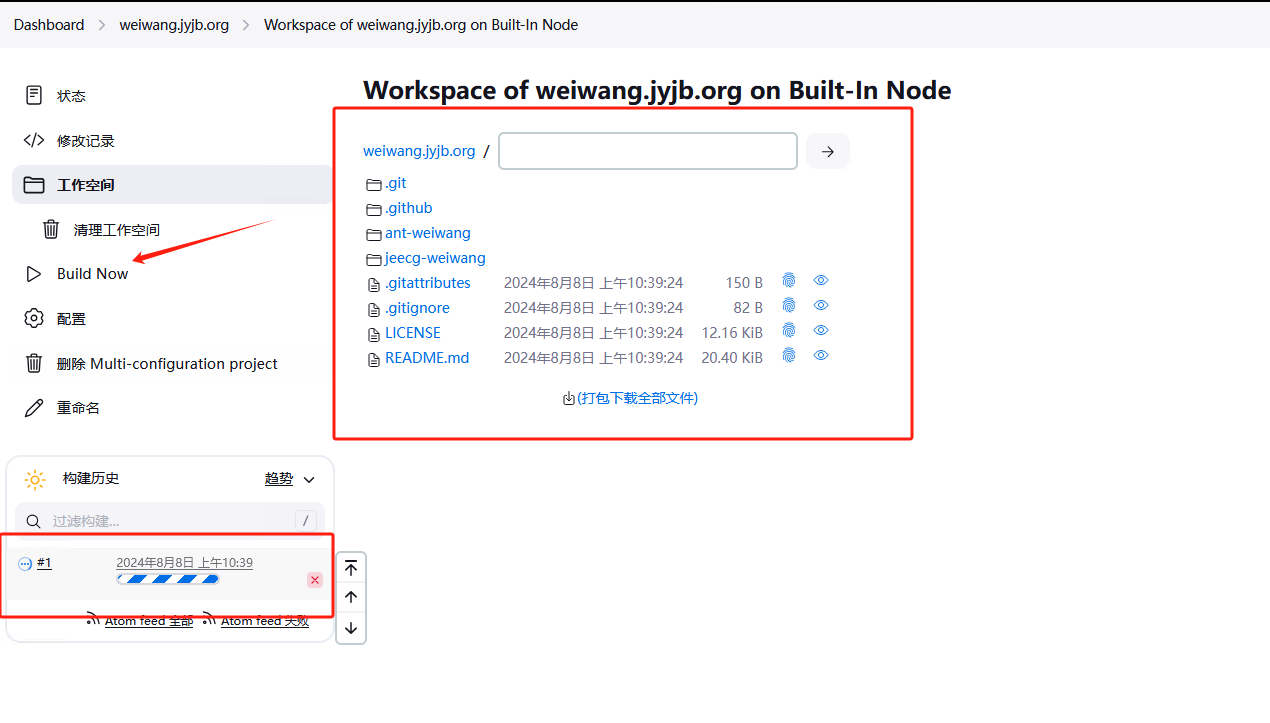
Test Git configuration, perform a build, pull the code, and check if it is successfully pulled in the workspace
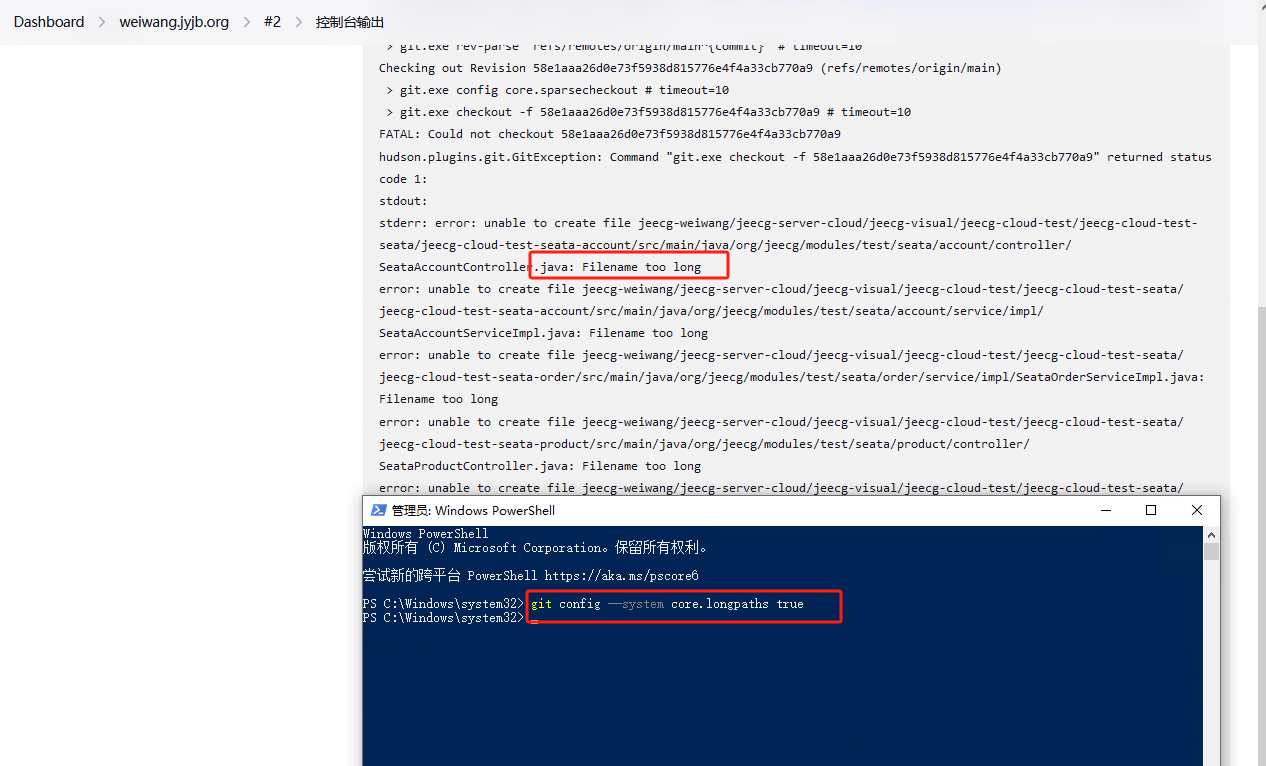
Solve the issue of file name being too long not supported in Windows system, start PowerShell as an administrator
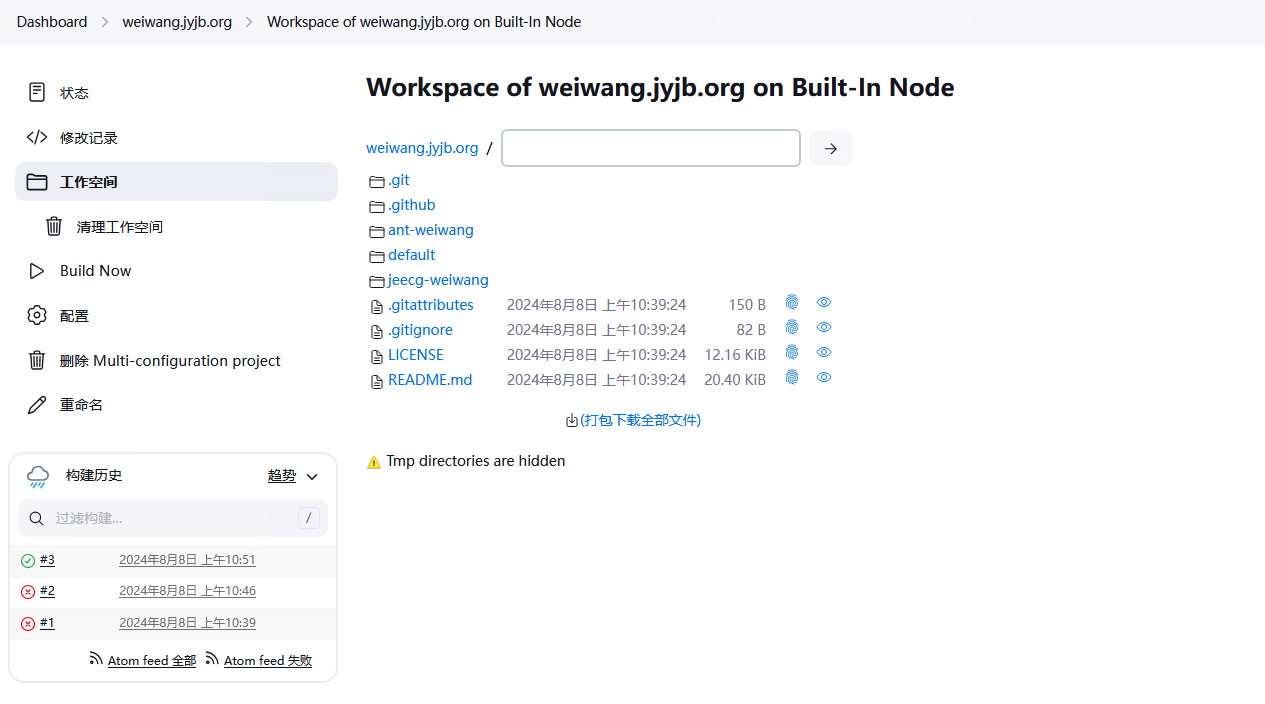
Repackage again, successfully obtain the code
4.3 Compile Source Code
Select Execute Windows batch command in the build steps, the command is to open the folder and compile the project using Maven
cd jeecg-weiwang
mvn clean package -P test,SpringCloud
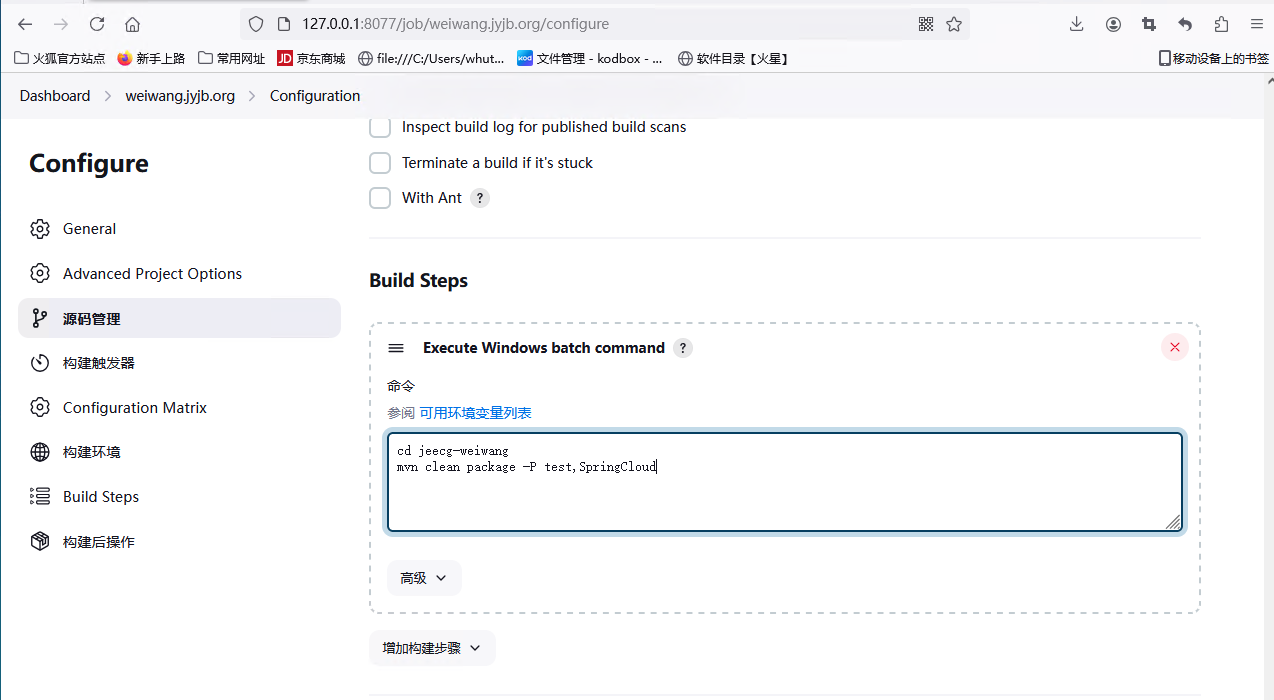
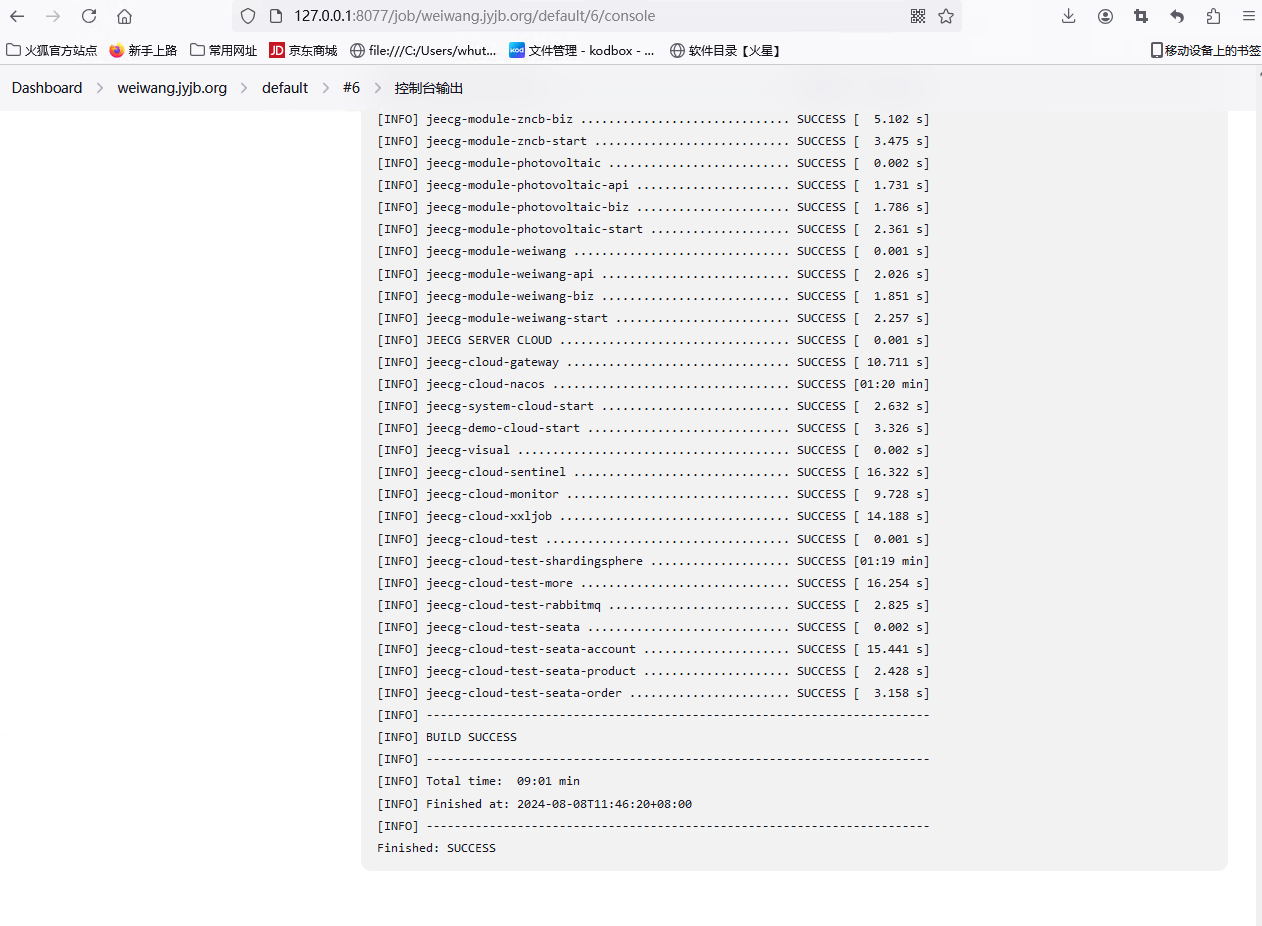
After configuration, perform a build, Jenkins will execute the compile command to package the project after updating the source code
An error occurred during packaging, the com.xiaozhuo:dlt645-07:jar:1.0.4 package was not found, as it is a custom jar package, it needs to be manually updated to the repository

mvn install:install-file -Dfile=E:\dlt645-07-1.0.4.jar -DgroupId=com.xiaozhuo -DartifactId=dlt645-07 -Dversion=1.0.4 -Dpackaging=jar
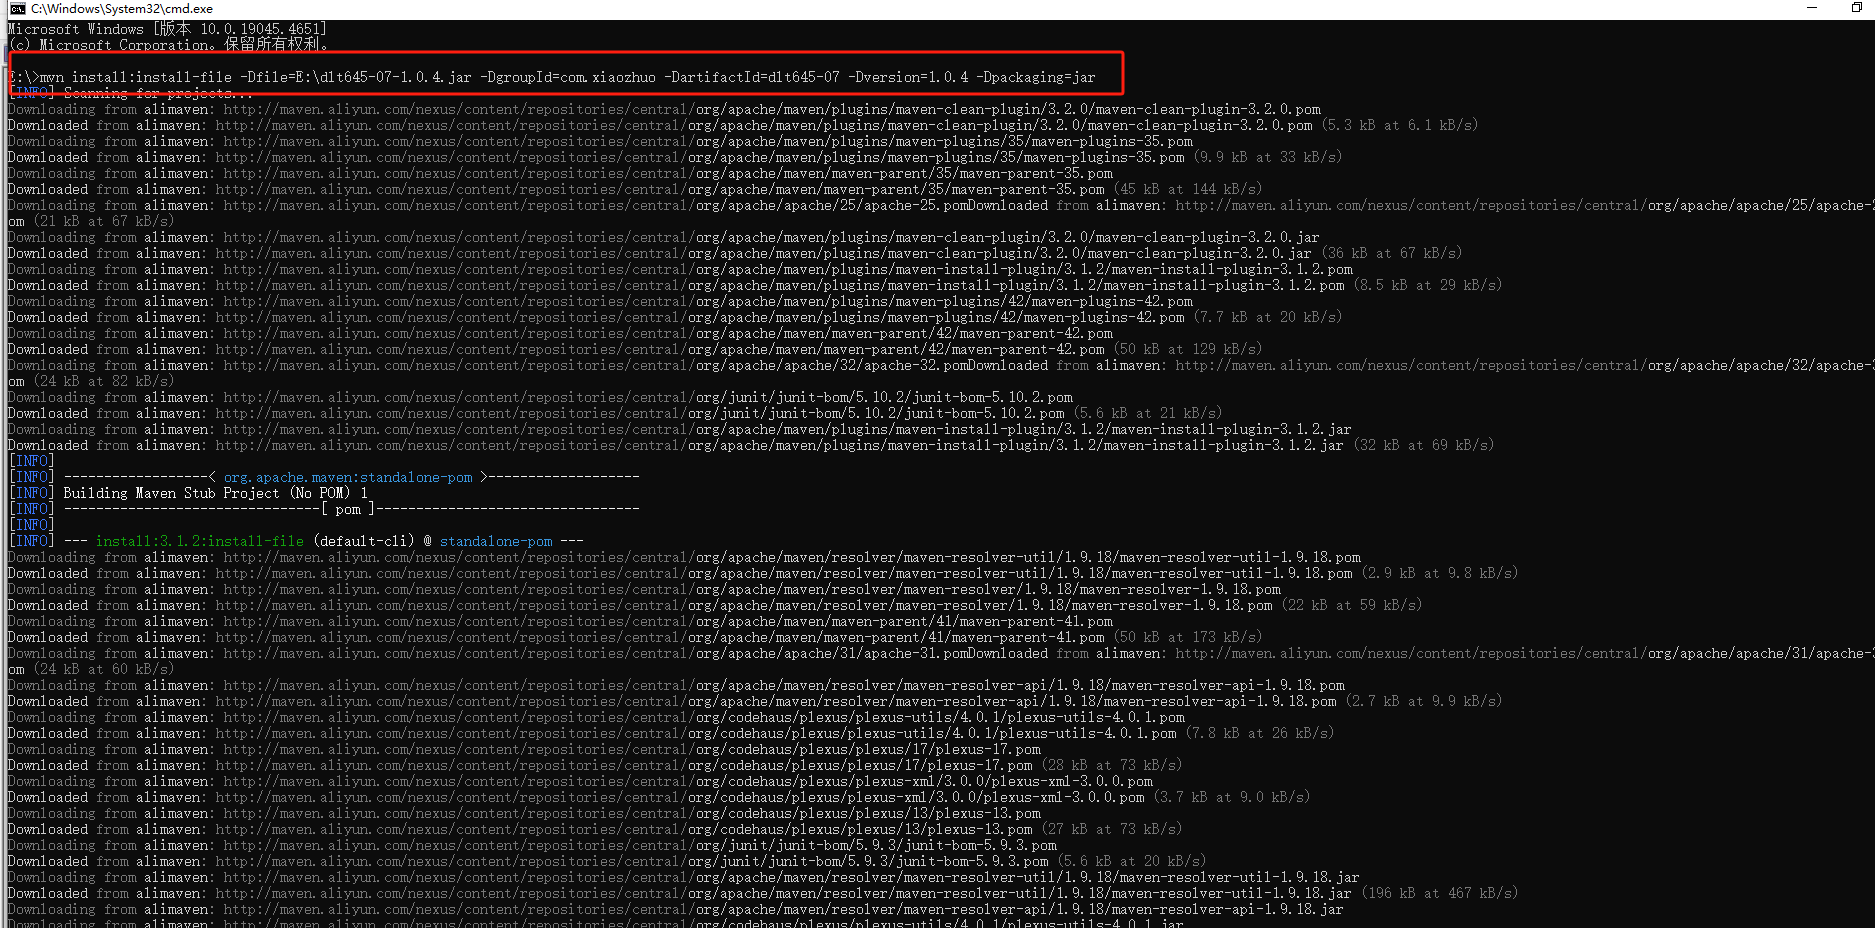
Recompile successfully
4.4 Configure FTP to Upload Jar Package
Add the build step ** Send files over FTP ** in the project configuration
![](
Can you be more specific about the content of your article? After reading it, I still have some doubts. Hope you can help me. https://www.binance.com/es/register?ref=T7KCZASX