Application of WebODM in Rooftop Photovoltaics
Due to the widespread distribution and relatively small individual area of rooftop photovoltaics, the exploration of rooftop photovoltaics involves a significant amount of work. Traditional rooftop photovoltaic construction involves manual house-to-house inspections, followed by door-to-door negotiations, and finally arranging personnel to measure relevant roof dimensions and take photos. This process presents the following issues:
- The homeowner is absent, making it impossible to inspect the house to determine its suitability.
- Measurement personnel, often not properly trained, frequently miss dimensions, leading to the need for re-measurement and increased labor costs.
- House sketches are not intuitive, making it difficult for designers to design irregular-shaped houses.
To address these issues, WebODM can provide a significant solution.
Introduction to WebODM
WebODM is a drone image processing software based on open-source technology, which allows for image processing and map creation through a web interface. WebODM offers a series of powerful tools that can process aerial images captured by drones, generating products such as digital elevation models and orthophotos, which are used in map making, environmental monitoring, urban planning, and other fields.
The features of WebODM are as follows:
- Open Source and Free: WebODM is based on open-source technology and is completely free, allowing for unrestricted use and modification.
- Web Interface: WebODM provides a web interface that is simple and easy to use. Users do not need to install any software and can access it by entering the address in a browser.
- Supports Multiple Data Formats: WebODM supports processing various data formats, including drone aerial images, satellite imagery, and LiDAR data.
- Fast Processing Speed: WebODM uses multi-threaded processing technology, leveraging the multi-core processors of computers to quickly process large amounts of data.
- Accurate Data Processing: WebODM uses SfM (Structure from Motion) technology, which can automatically extract feature points from aerial images and generate three-dimensional models, ensuring the accuracy of data processing.
- Generates Multiple Products: WebODM can generate various products, including digital elevation models, orthophotos, and point cloud data, catering to the needs of different users.
- Supports Cloud Computing: WebODM can run on cloud servers, eliminating the need for users to purchase expensive computer equipment, thus saving costs.
Overall, WebODM is a powerful, easy-to-use, and accurate drone image processing software that provides comprehensive data processing and map-making solutions for users.
WebODM Installation
WebODM installation can be done either automatically or manually. Automatic installation involves downloading the installation package from the official website for $57, which also includes one year of technical support. Manual installation is open-source and free. This tutorial introduces the manual installation of WebODM on a Windows 10 system.
WebODM Environment Preparation
WebODM requires certain software and hardware environment support to run. The software support needed includes:
These basic environments can be installed by searching online. It is recommended to replace Docker with a domestic source to save startup time. The hardware support recommended by WebODM includes 100GB of hard disk space and 16GB of memory space. The actual allocation can be adjusted based on the size of the images being modeled. The corresponding table is as follows:
| Number of Images | Memory (GB) |
|---|---|
| 40 | 4 |
| 250 | 16 |
| 500 | 32 |
| 1500 | 64 |
| 2500 | 128 |
| 3500 | 192 |
| 5000 | 256 |
During the installation and memory allocation process, various issues may arise. Solutions can be found in different blog posts. Here are some solutions to common problems:
- Virtualization not enabled on the system
- Enabling WLS2 for Docker
- Insufficient memory
- Changing Docker source
WebODM Project Startup
After the basic environment is installed, you can start the WebODM project with the following steps:
Create a new folder named “webodm” in a directory, right-click and use Git’s command-line tool to enter the commands:
# Clone the project to the local machine
git clone https://github.com/OpenDroneMap/WebODM --config core.autocrlf=input --depth 1
# Enter the project folder
cd WebODM
# Start the project
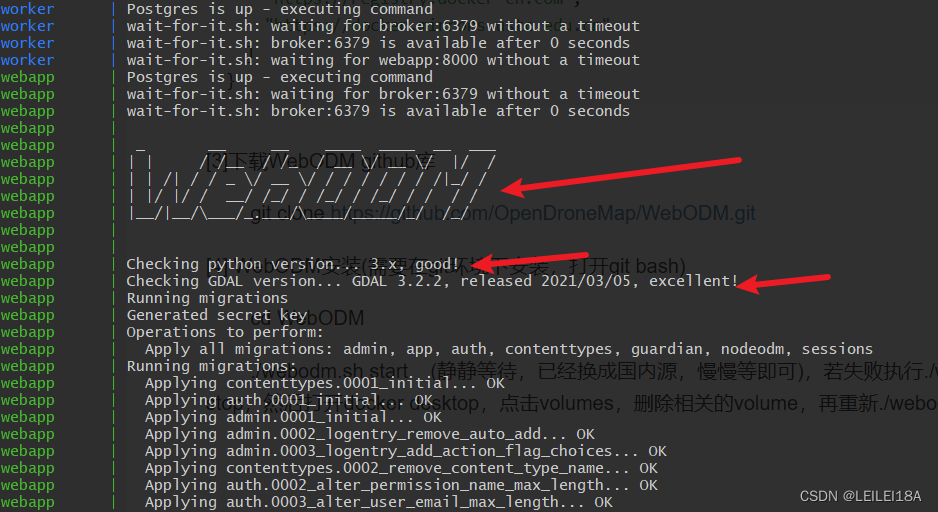
./webodm.sh start
Starting the project will take a long time. If there are no errors, wait patiently until the following image appears, indicating that the installation is successful.
In Docker Desktop, you will see the following interface:

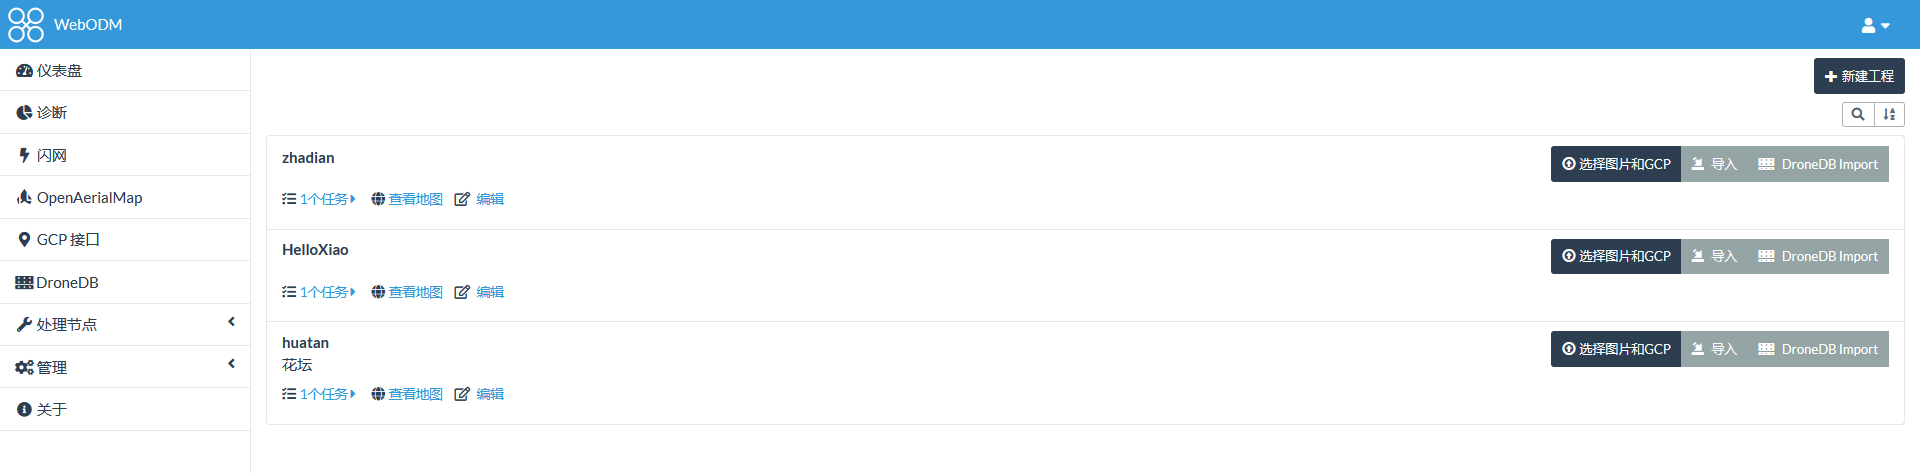
Enter localhost:8000 in the browser to open the initialization page. You need to register an admin account and password. Enter your admin account and password to log into the system, as shown below:
WebODM Project Application
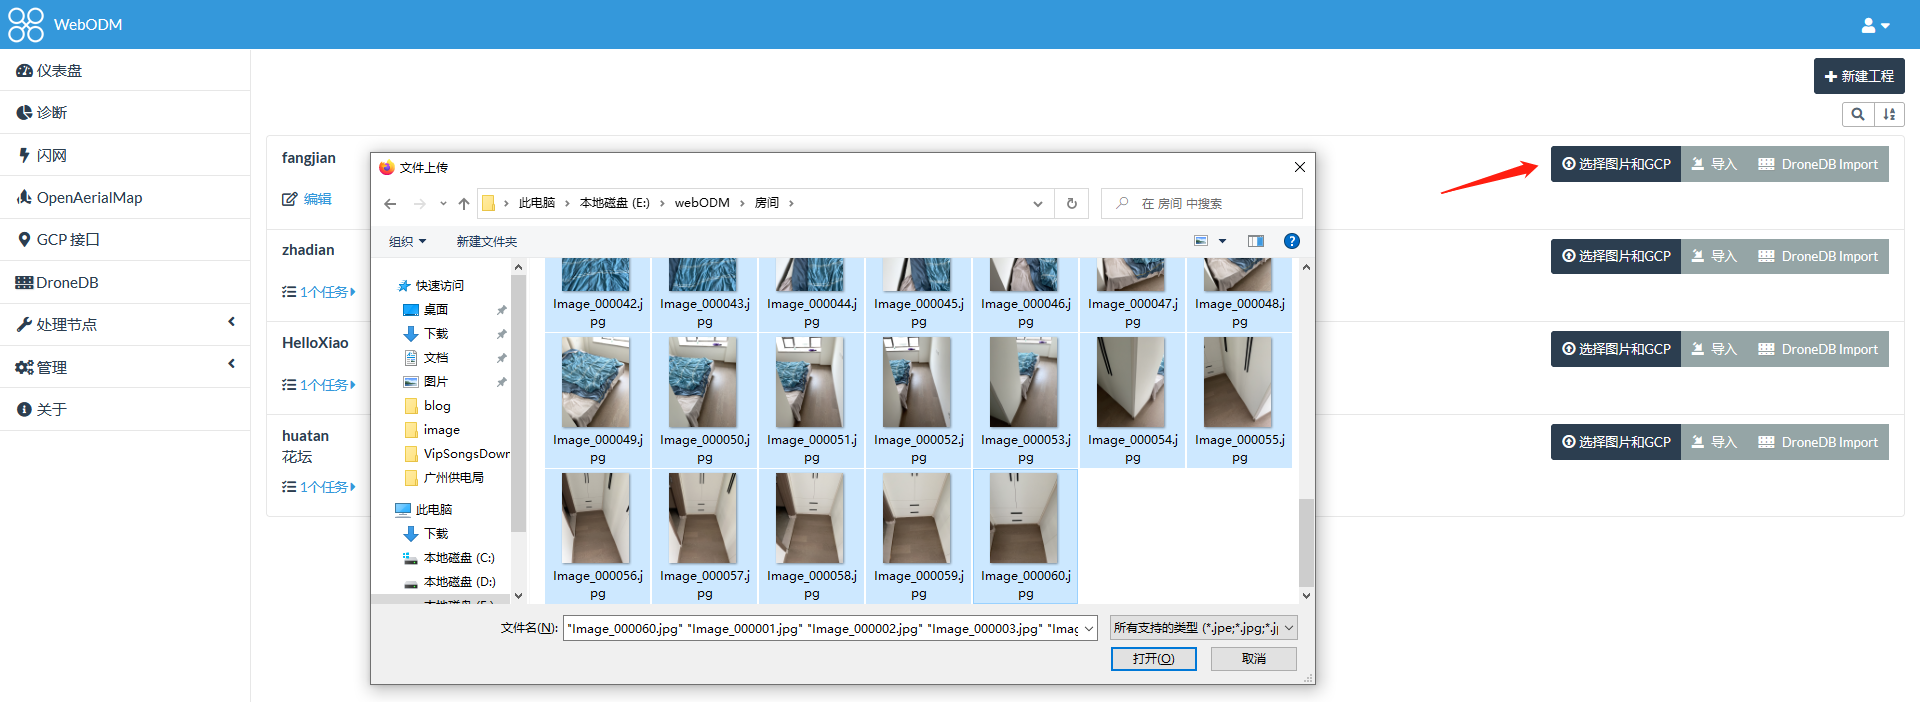
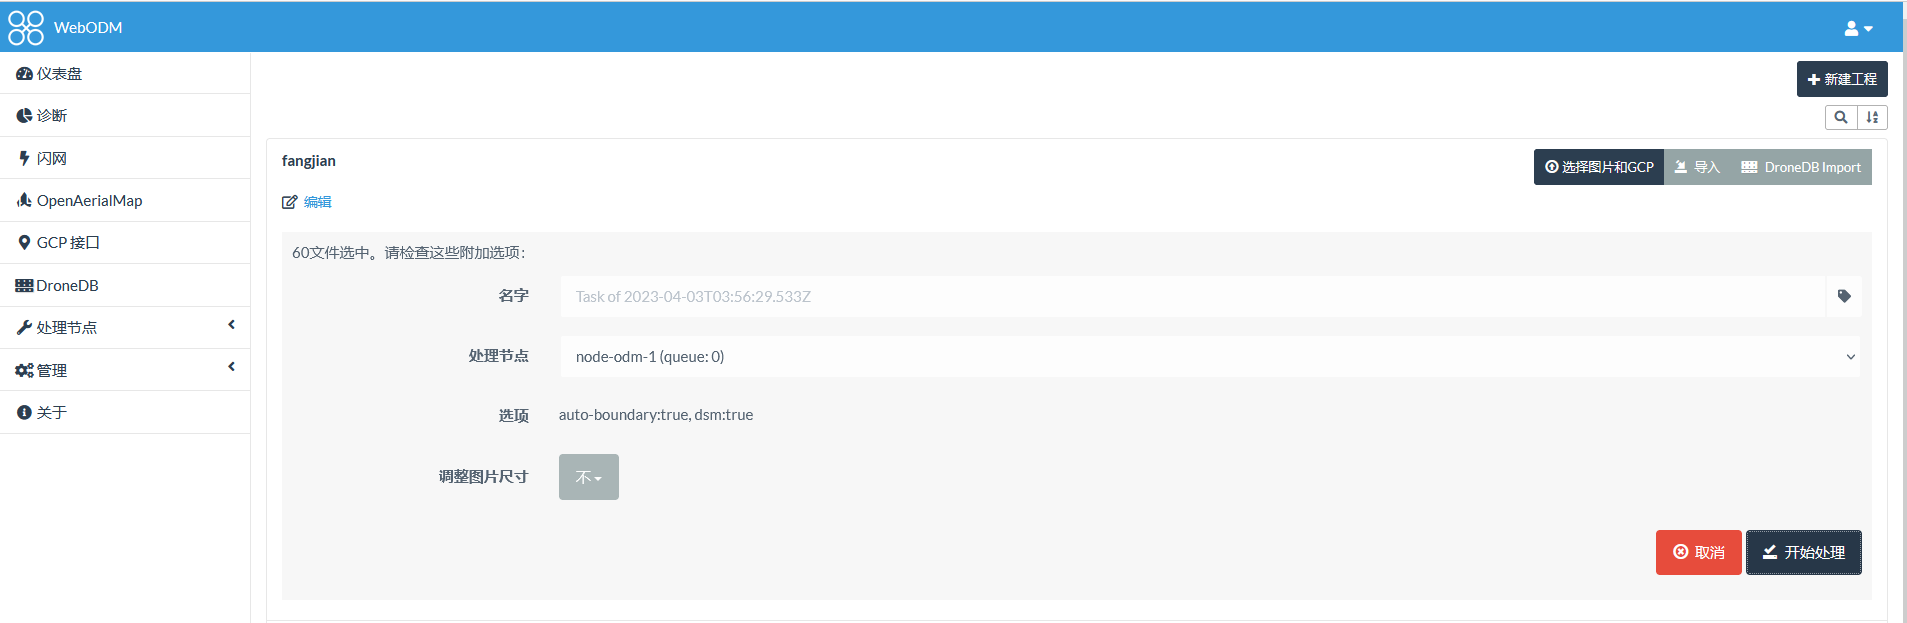
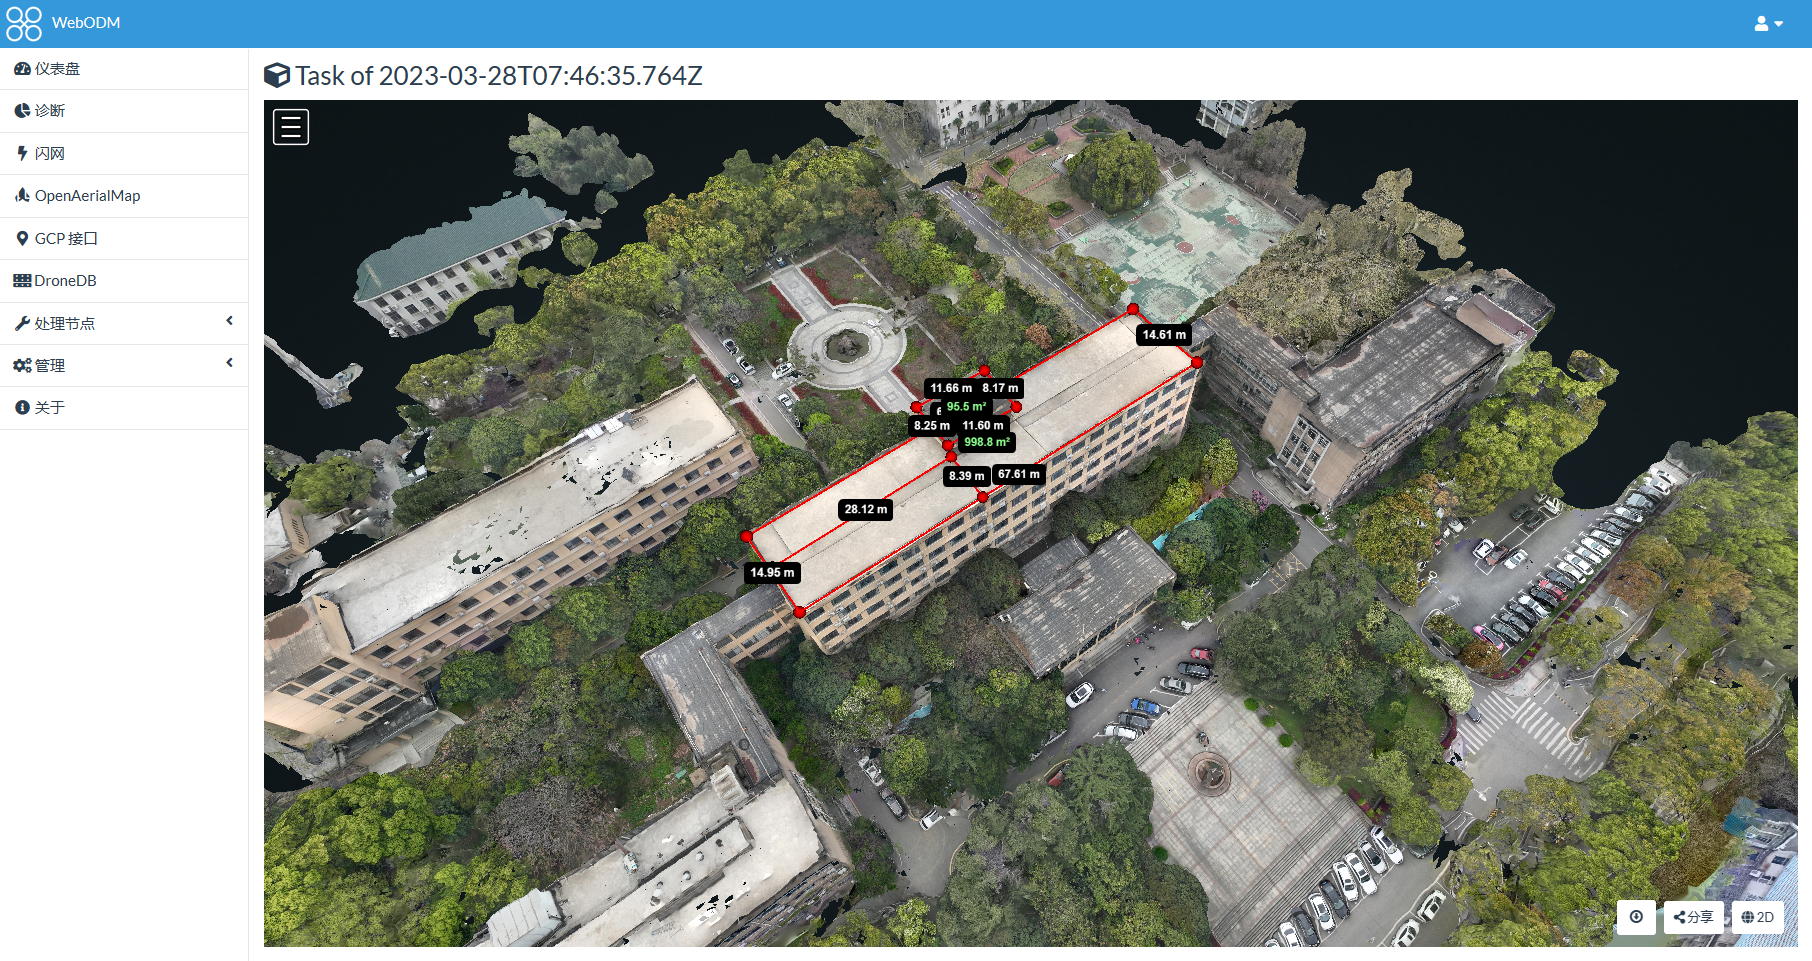
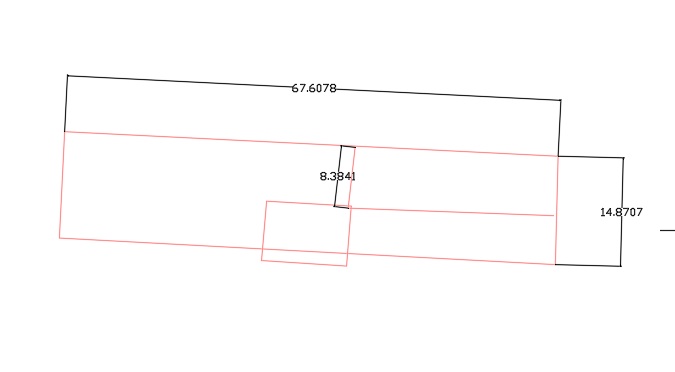
Once the WebODM project is started, you can proceed with project modeling by simply selecting the photos for scanning. After successful modeling, you can measure the distance, height, area, and volume of the modeled object and export the measurement results as a DXF file, which can be opened with AutoCAD to obtain a flat sketch.
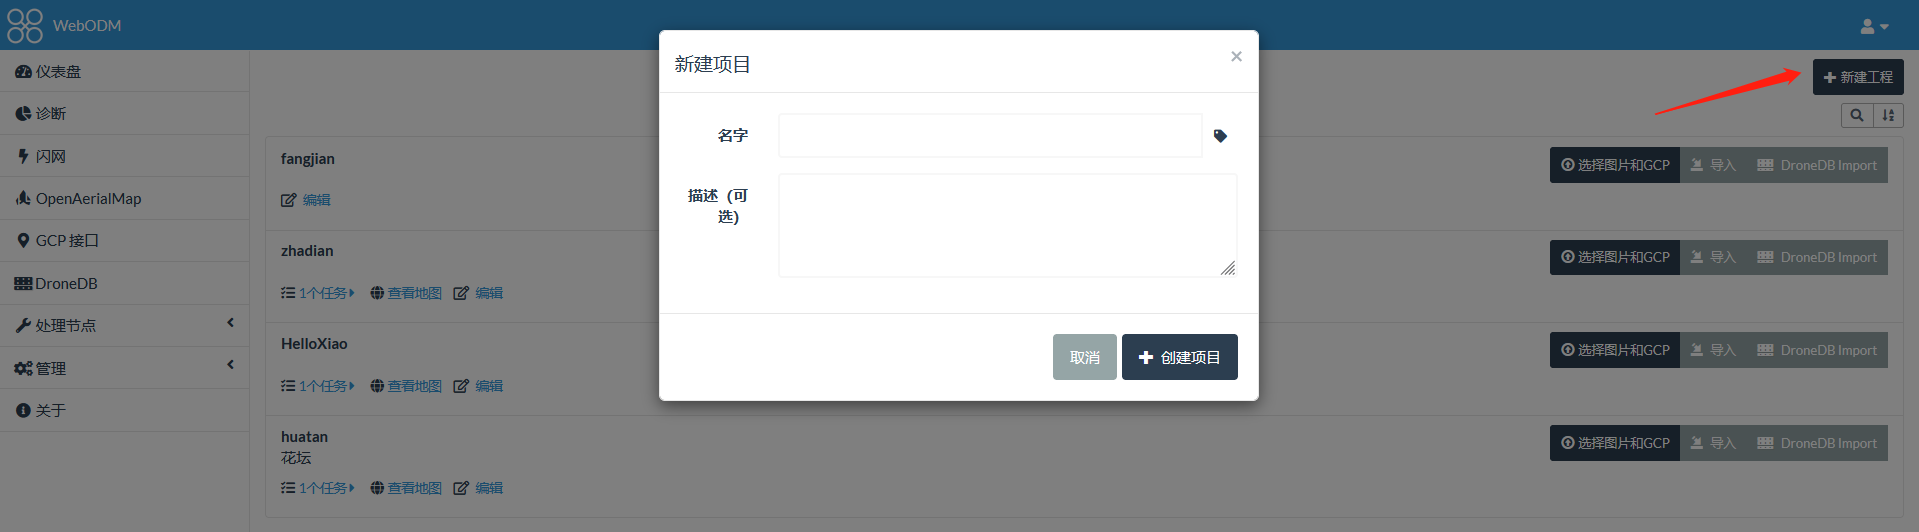
- Create a new project
- Add images
- Process images
- View 2D orthophoto

- View 3D model and measure
- Export DXF file to CAD
Thanks for sharing. I read many of your blog posts, cool, your blog is very good.